
- The canvas and card imposition
- The session card
- Sidebar Cards
- A consistent graphical language
- Other cards
- Every edit is attributed
- Big changes run as arcs, a better way to use git worktrees
- Data visualizations in the transcript
- Ask how anything works
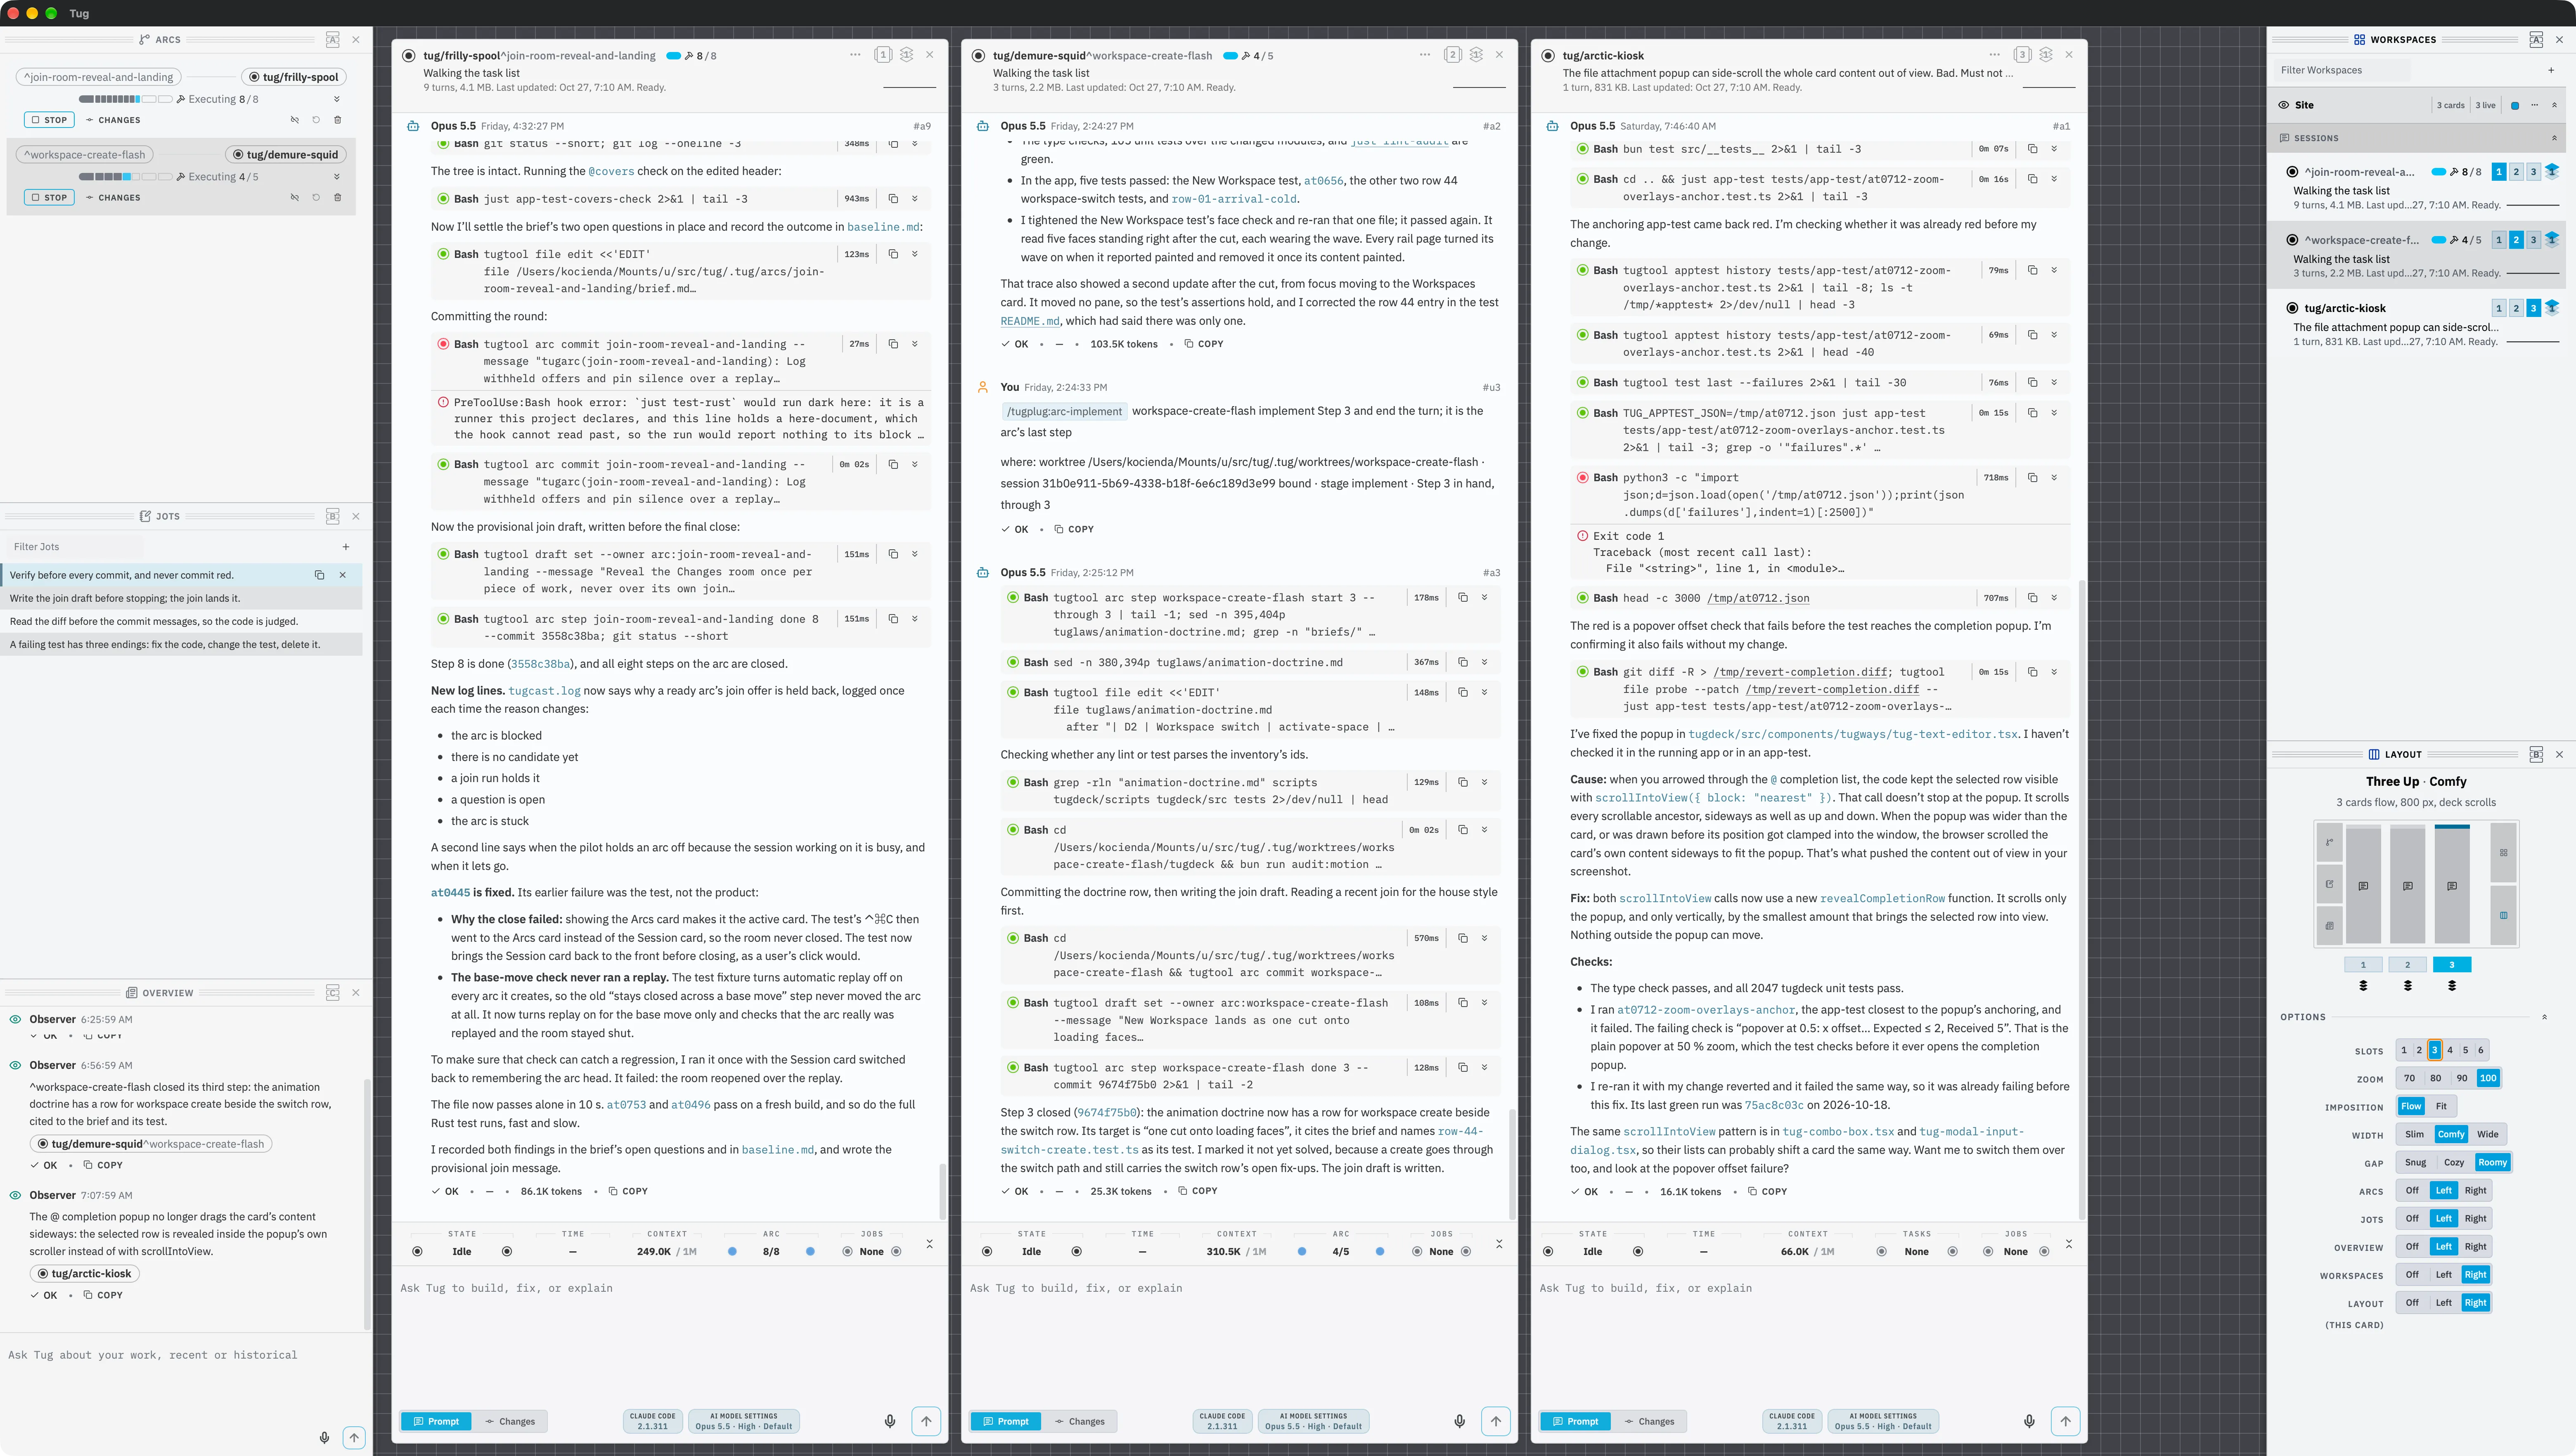
The canvas and card imposition
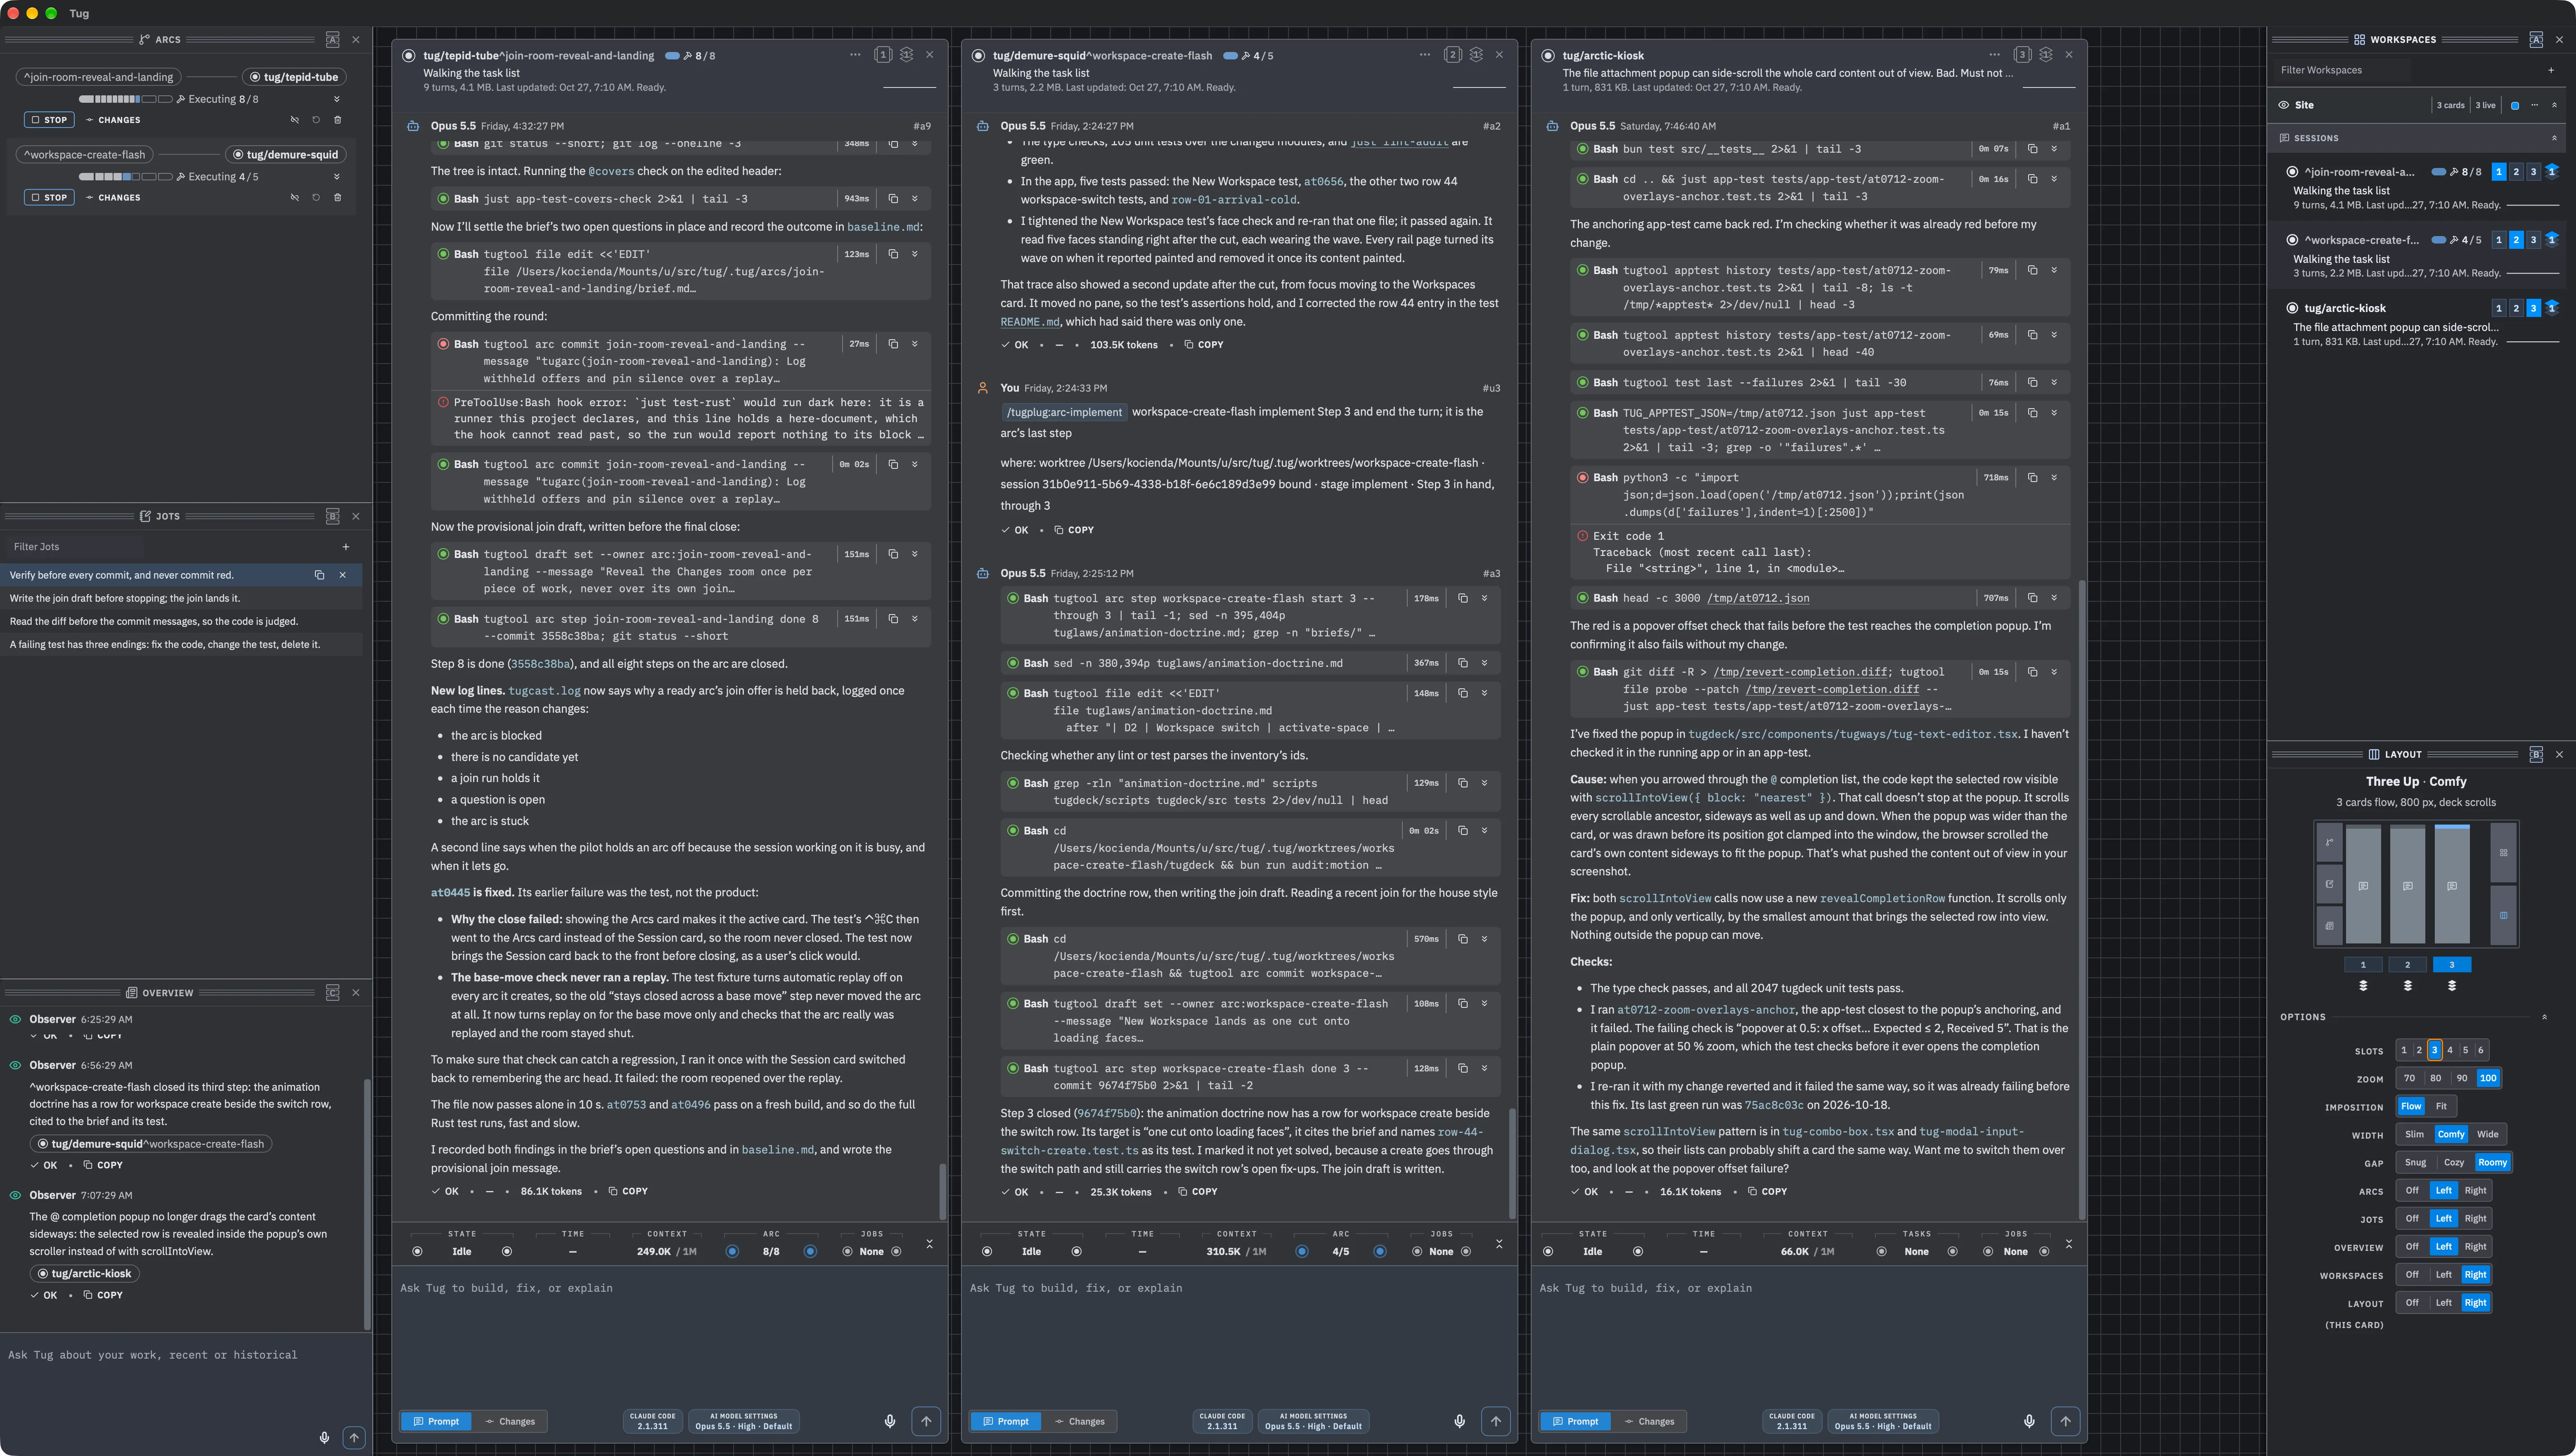
In Tug, one window displays a canvas, on which it lays out a deck of cards. There are cards for AI coding sessions, workspace management, layout control on the deck, jotted-down notes, text editing, image/file viewing, and more. Every card has a masthead, the strip across its top that names the card and shows its controls.
Run four AI sessions in terminal windows and you know the feeling. Content overlaps, one session gets lost behind another, the one that needs you is the one you cannot find, and every time you resize a window you resize three. Tabs are no better: a strip of truncated titles that all begin the same way. But the canvas has a trick up its sleeve. It auto-arranges your cards under a scheme called imposition. The word comes from printing, where imposition is the layout of pages on a press sheet so that each lands in its place when the sheet is folded, cut and bound. Tug’s canvas does the same for cards. The canvas is divided into columns called slots. Every card lives in a slot at the width you set. You never need to position a card by hand. Resize the window and every card re-finds its place.
Dealing out cards There are two different ways for slots to arrange themselves out with respect to each other. Fit spreads the slots across the window so every card is inside it at once, and neighbors overlap. Click a card to bring it to the front. Flow positions the cards side by side at their full widths and lets the row scroll past the window’s edge. Activate a card and the row slides just far enough to bring it into view.
More cards than slots. A session and the file it is editing belong together, and a slot can hold them both. By default the cards in a slot stack: they share one place, the front card is the one you see, and a stack badge in its masthead counts the cards in the slot. Click the badge for a picker of what is in the stack. When you want both in view at once, a test log above the session that is running it, split the slot instead: its height is divided among its cards, each lettered A, B, C from the top, with a seam to drag between them. One command toggles a slot between stack and split.
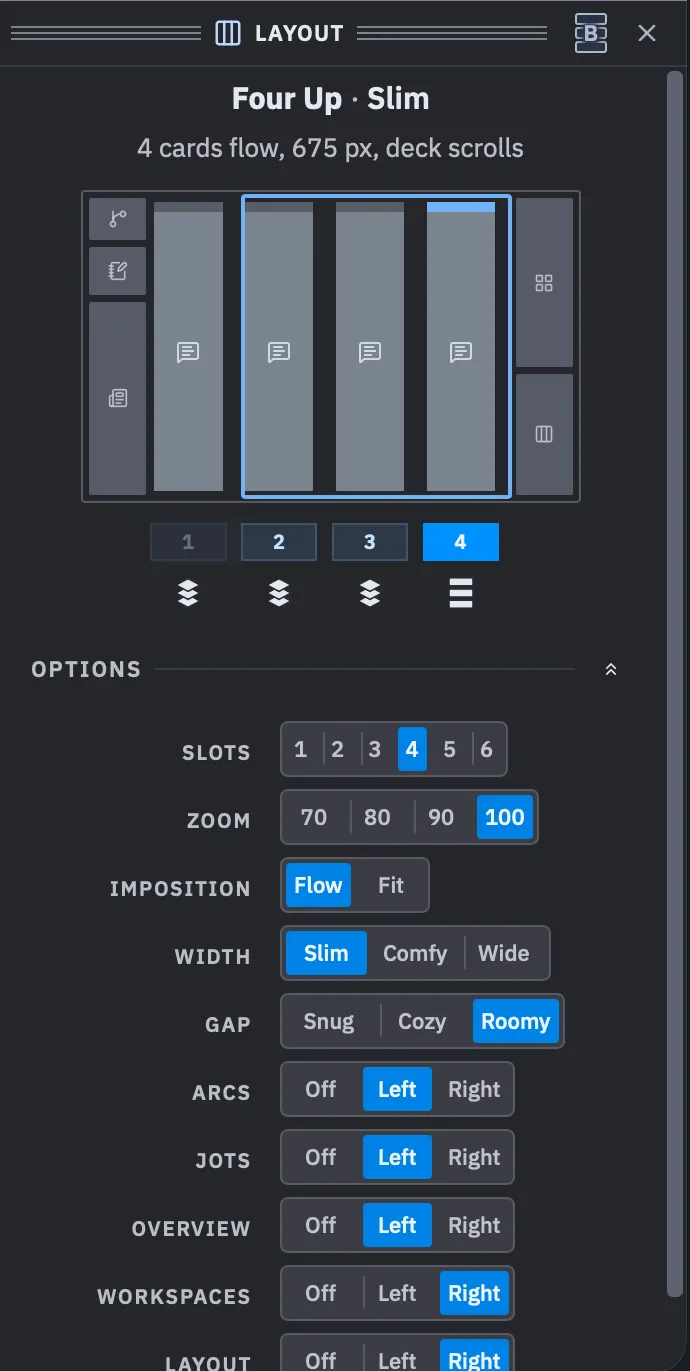
You always know where a card is. Under a layout of two or more slots, every card shows its address in its masthead, and the address has up to two parts: the slot number, then how that slot is arranged. In a stack the second part is a count of the cards in it; in a split it is a letter, A for the top card and B, C for the rest. Numbers name slots and letters name bands, and an address like 2B reads the same wherever you meet it, in a masthead, a sidebar row or the Overview’s narration, so a card named by its address is a card you can go straight to. The address is also a control: press the slot number to send the card to another slot, or the count or letter to see what else is in this one.
Send a card where you want it in one press. A card moves by naming its destination. Press the slot badge in its masthead and the whole arrangement opens as a picker, a miniature of the deck with every slot drawn, and one click sends the card there. From the keyboard, ⌘1 through ⌘6 does the same without the picker. Every move animates and the moving card’s border highlights, so there is no guessing where it went.
Or just pick it up. Drag a card by its masthead and it moves freely under the pointer, while exactly one drop zone lights at a time: the slot it will land in if you let go. The zone snaps from slot to slot as the pointer crosses the deck, so a drop never lands nowhere and never lands somewhere surprising. Let go and the card settles into the zone and the others settle around it. Escape cancels and the card goes home.
Minimize a card without losing it. A session that is busy for the next ten minutes does not need the screen, but you do not want it gone. Fold collapses it to its masthead: it keeps its slot, its address and its live readings, takes almost no room, and opens again on one press. In a split slot, folding makes a wall. Open any card in the wall and its neighbors fold, so you read one card at a time while the rest stay a glance away.
Read one thing, then come back. When a transcript deserves your full attention, Bullseye takes the focused card to the center of the window at a comfortable reading width and slides every other card off to the side it was on. It is a posture, not a rearrangement: it writes nothing to the layout, so click another card, move the keyboard focus, or press the chord again and everything returns to exactly where it was. You never pay for a close look by having to rebuild the deck afterward.
Hands stay on the keys. Everything above has a chord, and the chords follow one pattern rather than a list to memorize, so after a day you stop thinking about them. ⌘ with a digit moves a card to that slot; ⌃⌘ with the same digit moves you there. Bracket keys step through a series, with [ always back and ] always forward. Arrow keys point at a place: ⌥⌘ with an arrow hands the keyboard to the card in that direction, and ⌃⌘ with ↑ or ↓ moves the card itself up or down a split slot.
One deck per project. Three projects’ sessions interleaved in one window is the terminal problem all over again. A workspace is a named deck with its own arrangement and its own theme, one per project or per kind of work, and the Window menu or the Workspaces card cuts between them. A parked workspace keeps every card exactly as you left it, so coming back to a project is a cut, not a rebuild from files or history.
The same deck on a laptop and a big display. ⌘+ and ⌘− zoom the whole app, from 50 to 200 percent, scaling layout, type and spacing together, so the deck you built on the desk reads the same on the train. ⌘0 returns to actual size.
Tell your projects apart at a glance. Ten themes, five dark and five light, each a single tint hue laid over a shared tone skeleton, so every theme has the same structure and only the color changes. A workspace wears its theme on its own, so the color of the window tells you which project you are in before you read a word. All ten are held within a contrast budget that keeps text, links and controls legible in every one.
The session card
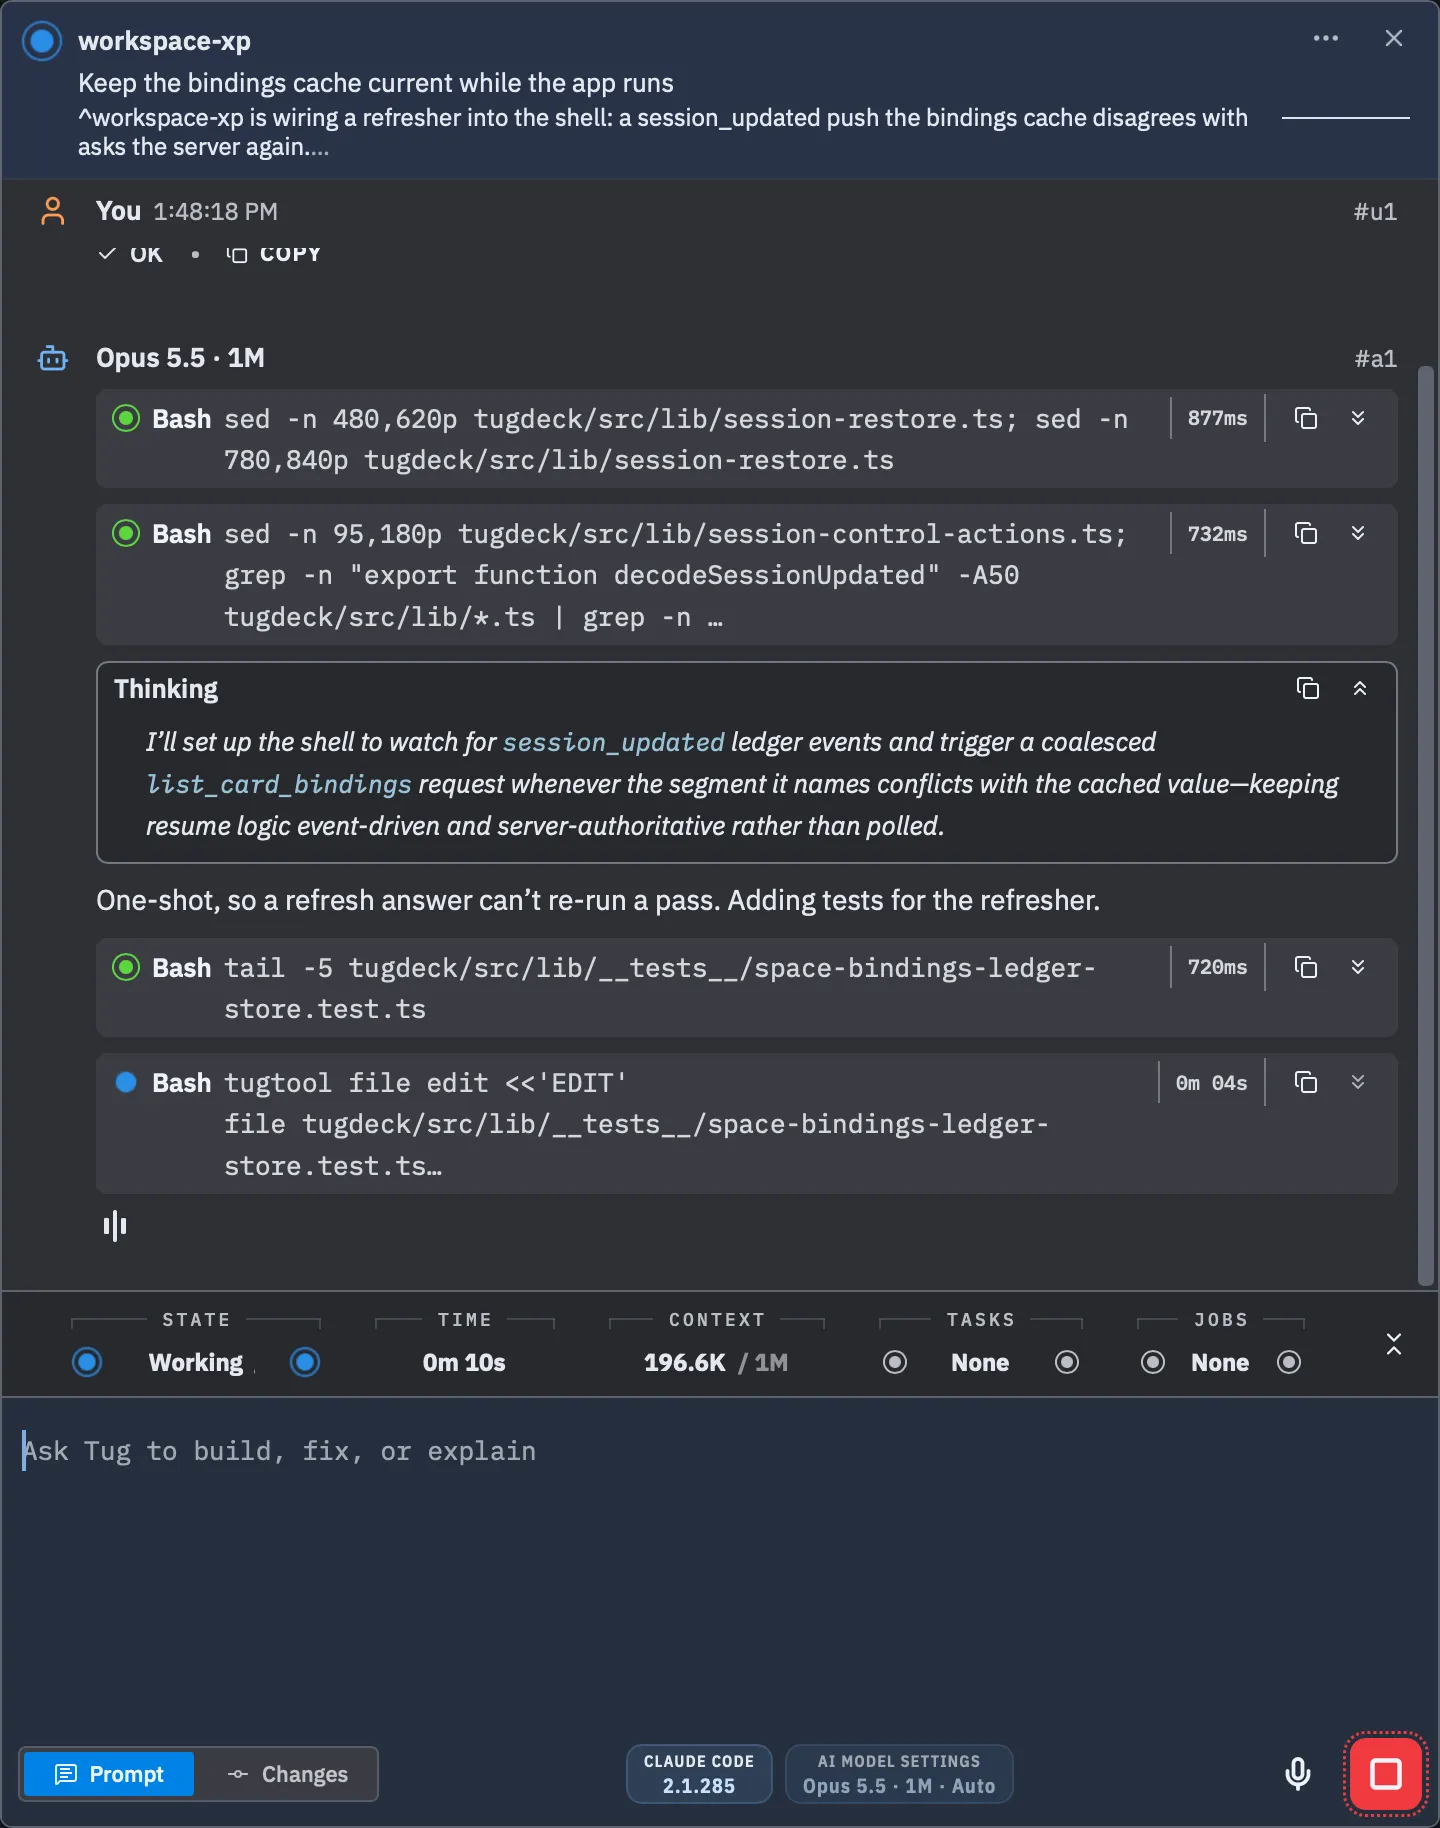
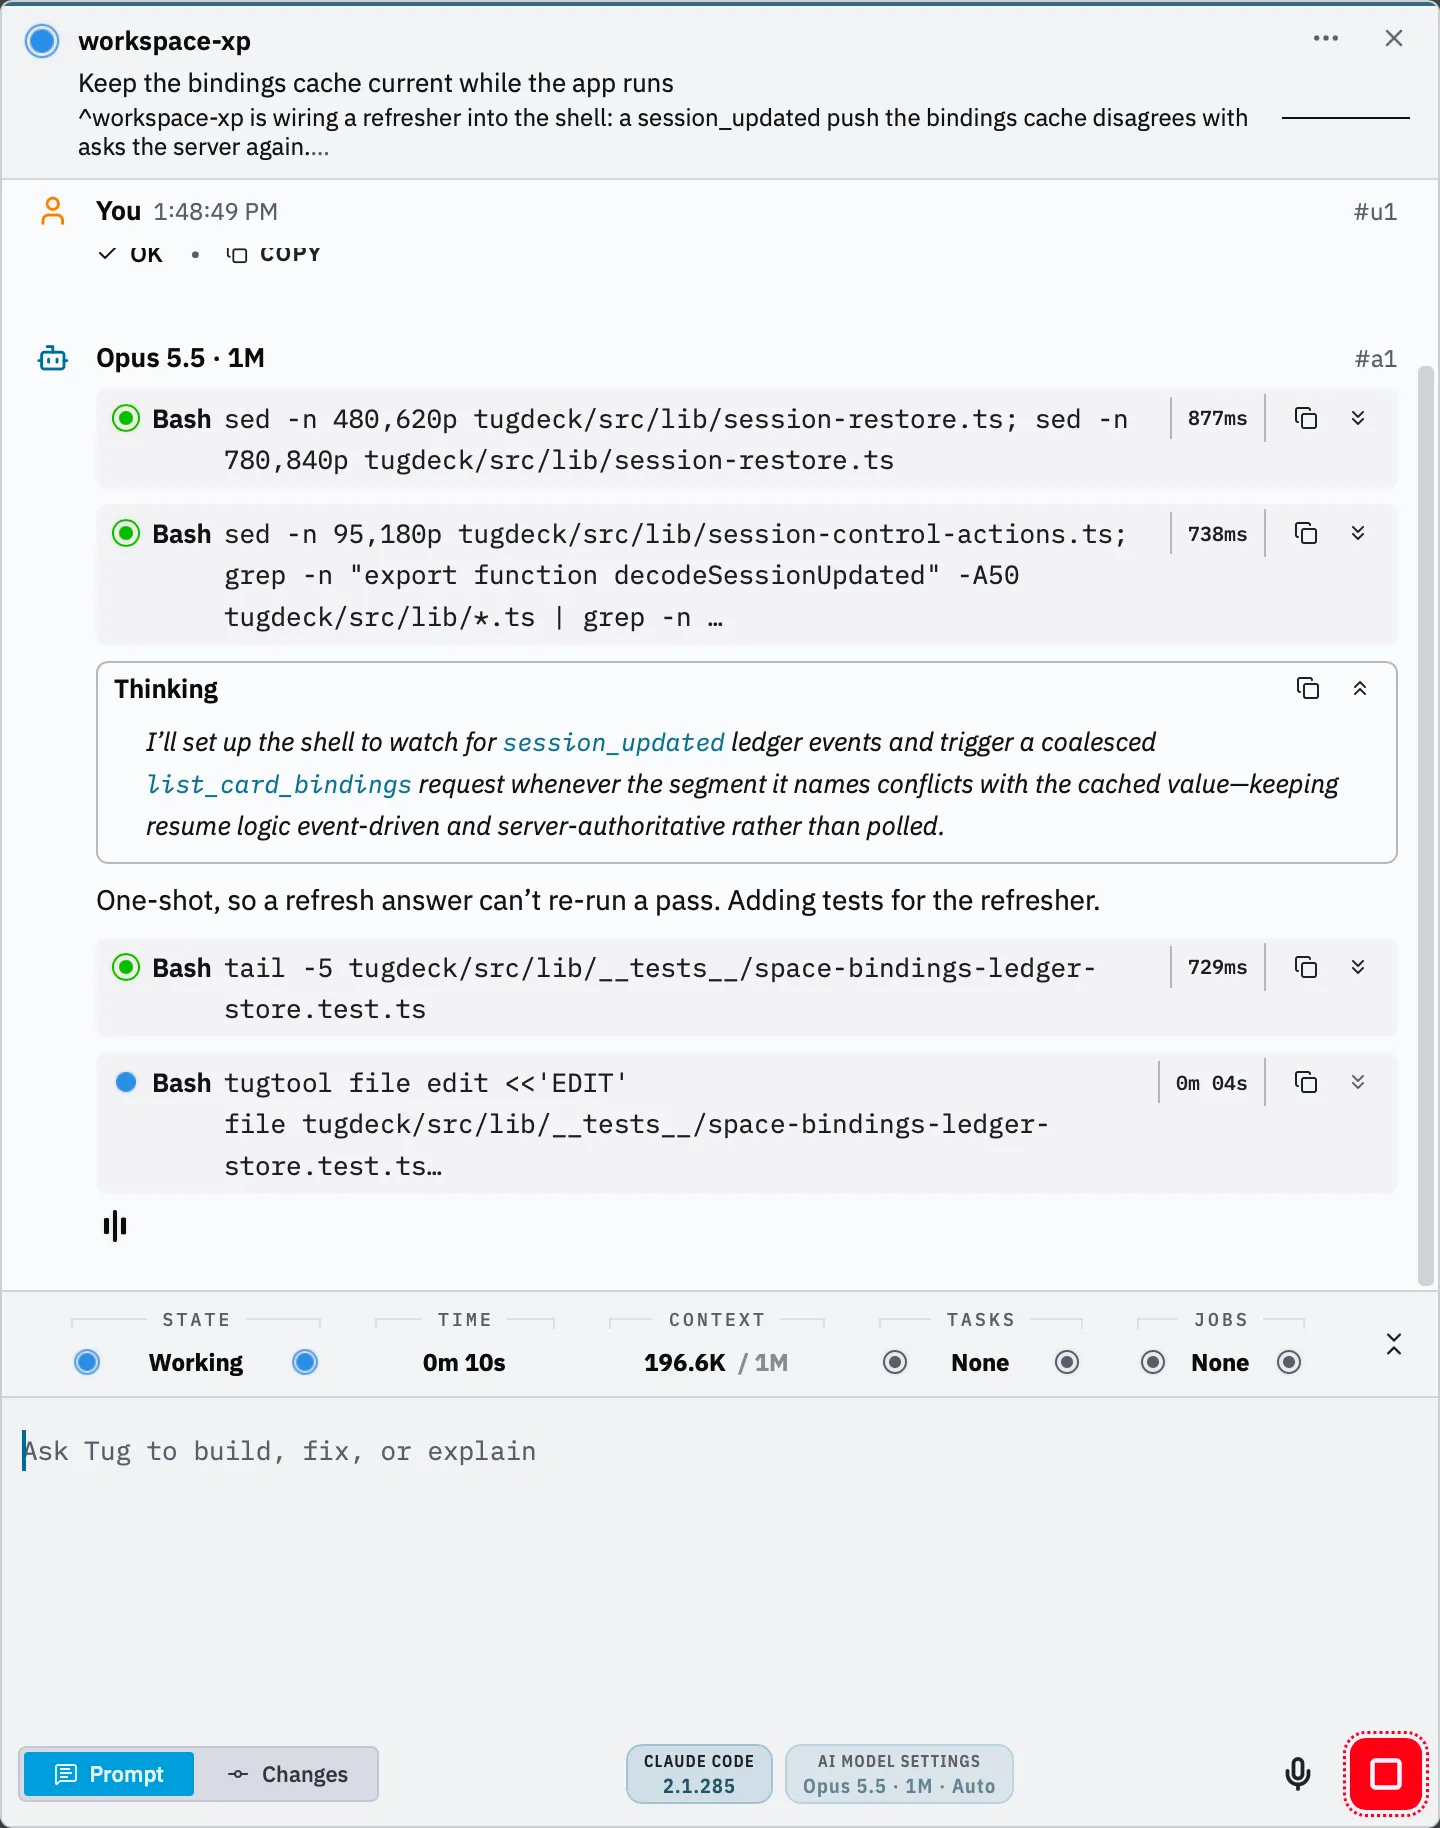
In a terminal, one piece of work is spread across several places: the conversation in one window, the diff in another, git in a third, and the question the model asked you somewhere up the scrollback. The session card puts all of it in one scrolling document. It is a conversational transcript with a prompt entry at the bottom, and it holds the Claude Code connection, a shell, the plans, the code review, and the git commits for that one line of work, so everything you need to know about what a session did is in one place.
Read it top to bottom. The masthead displays the session’s pulsing dot, its name, which you can customize, the badges that say where it sits on the deck, a live activity sparkline, and two lines of narration: what the session is working to accomplish, and the concrete task it is doing right now to get there. Below it the transcript scrolls: your prompts, the model’s replies, each shell command and file edit as its own block, a test run showing its progress as it goes, and every commit with a receipt. A status row reads out the session’s state, elapsed time, context window, tasks and background jobs. The prompt entry is at the bottom, where you would expect it from any messaging app, and at the bottom, the Prompt can change to show Changes which gives you the current view on what files the session has changed and lets you commit it when you are ready, and can auto-generate a commit message if you wish. It’s easy to run several sessions at once, on one project or several, each with a card of its own.
Sidebar Cards
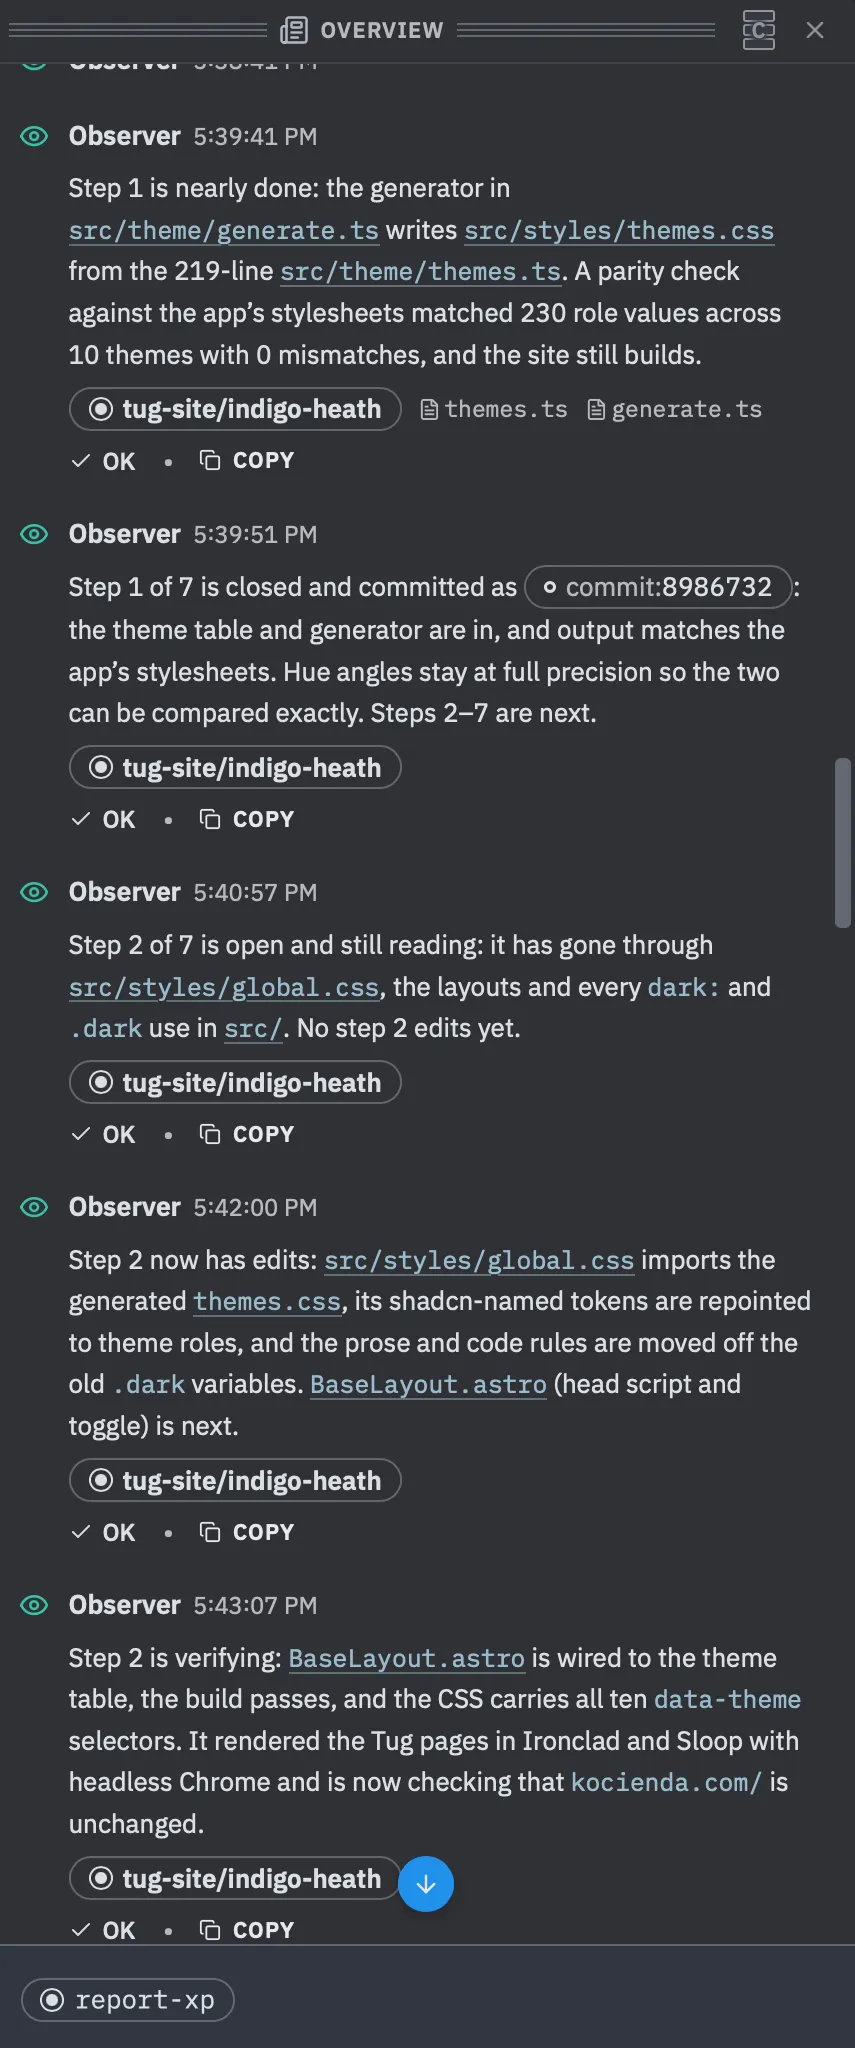
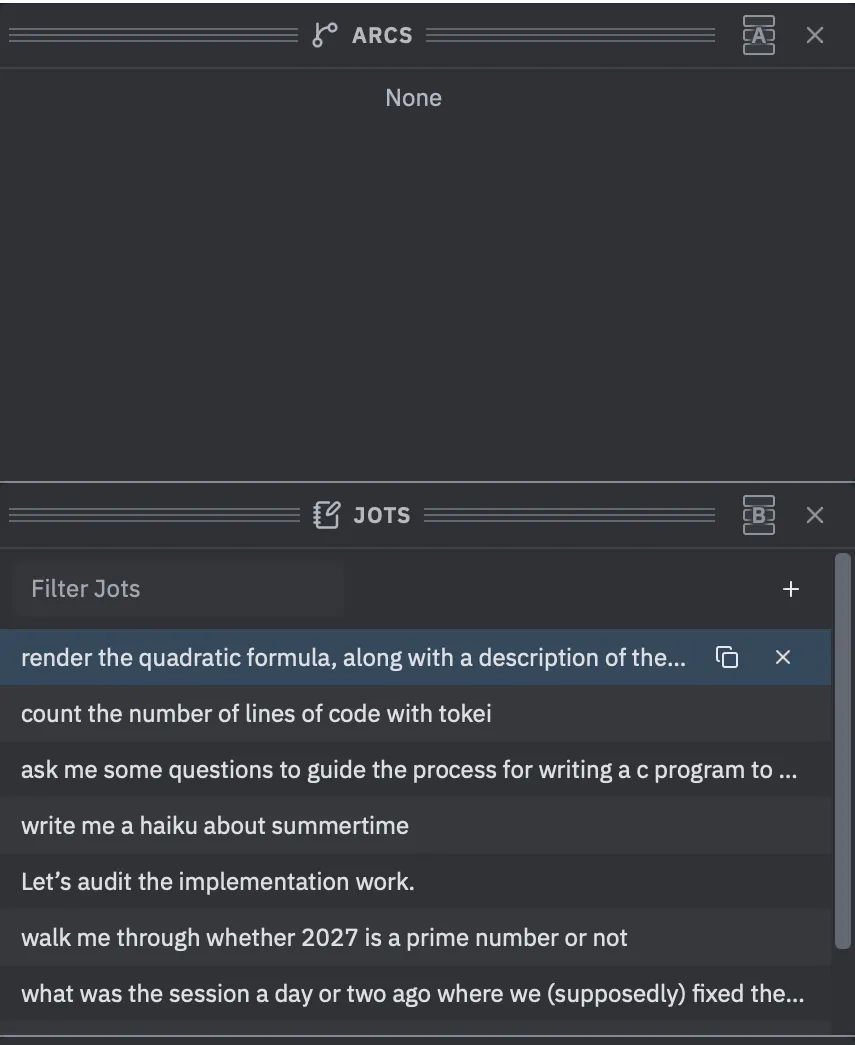
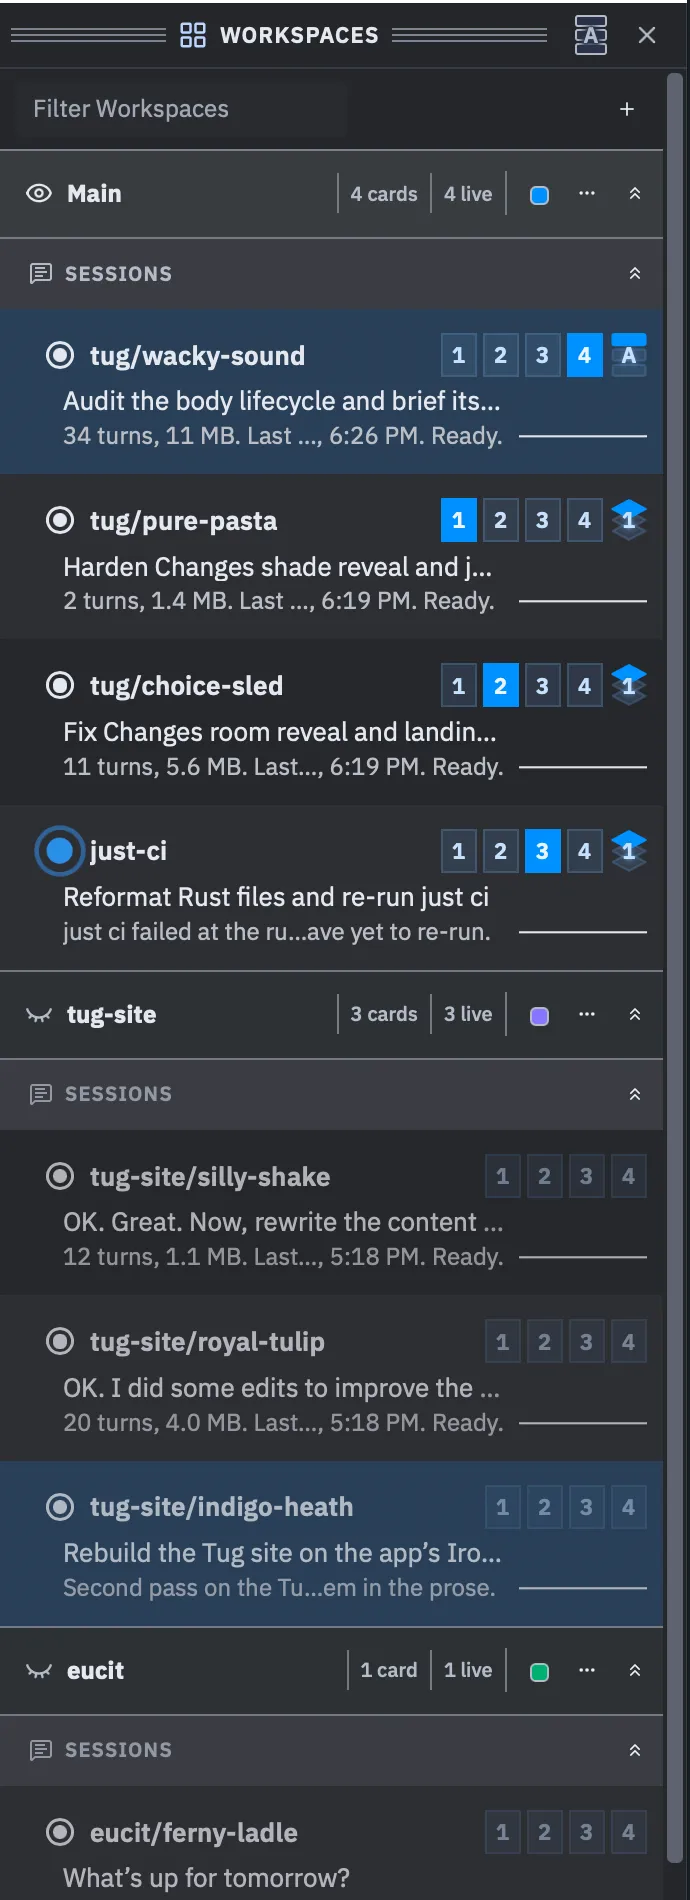
With many sessions running, it can become difficult to manage all the concurrent work. Tug Sidebar cards help. They pin to the edges of the canvas: they keep track of your sessions and projects, hold jotted-down notes you can reuse, and control the organization of the deck. Overview is a narration channel. Think of it as a social-media-like feed that summarize all your active sessions across every project as it happens. You can ask it questions about what any session did, today or in the past, and get convenient links to jump back into a session or file that gets mentioned. Arcs lists every long-running plan in every open project with its lifecycle track and step progress, so your lengthier session work is never out of sight. Jots holds the prompt fragments you find yourself typing again, ready to drag into any composer. Layout is a scale miniature of the canvas and your card deck you can press and hover, with rows for slot count, arrangement, card width, zoom and sidebar placement, so rearranging the deck is simple. Workspaces is the map of everything open: every workspace, and under it every card on that workspace’s deck, grouped by kind. A session’s row shows its name, the line that says what it is for, its latest activity and its state dot, with badges that show where the card is positioned on the canvas, so one list tells you what is running everywhere and which of it needs you. Click a row to bring its card to the front, filter the list to find a session, drag rows to reorder cards and workspaces. Assign a different theme to a workspace so you can more easily tell it apart.
A consistent graphical language
In a terminal, the state of a session is text. To learn whether a session is working, waiting on you, or finished, you read its scrollback. To get caught up on six sessions, you need to read all six. To simplify this, Tug speaks in a consistent graphical language. The state of concurrent work can be read at a glance rather than parsed out of prose, and the same graphics and icons mean the same thing everywhere they appear.
Key objects look the same everywhere. A commit, a session, an arc, or an image is one mark wherever it appears: a session is always tug/choice-sled and a commit is always commit:3c8d44c2, in a prompt, a transcript, a sidebar row or a receipt. So the commit the Overview mentions and the commit in a receipt are recognizably the same commit. You can copy and paste these session and commit atoms between Tug windows, so it's easy to refer to them in other prompts and sessions.
Glance at session state from across the room. I can tell the state of a session from across the room. A session shows a dot that pulses while the session is working, turns yellow when it’s waiting on me, turns green when a lengthy plan has finished, and holds still when the session is idle. A glance at a row of sessions, or at the Workspaces sidebar listing all of them, tells me which ones need me and which I can leave alone. A three-bar thinking wave appears beside a session while the model is mid-turn and disappears when the turn ends. Every session has an activity sparkline, and an arc’s whole life is one strip with the active stage blinking.
Learn a control once. About a hundred purpose-built components, each integrated into one theme system. Everything from a checkbox to the transcript follows one authoring guide, so a control learned in one card is known in every card, and a new kind of card is never a new interface to learn.
Current view: grid
Result: none
Result: none
Result: none
Other cards
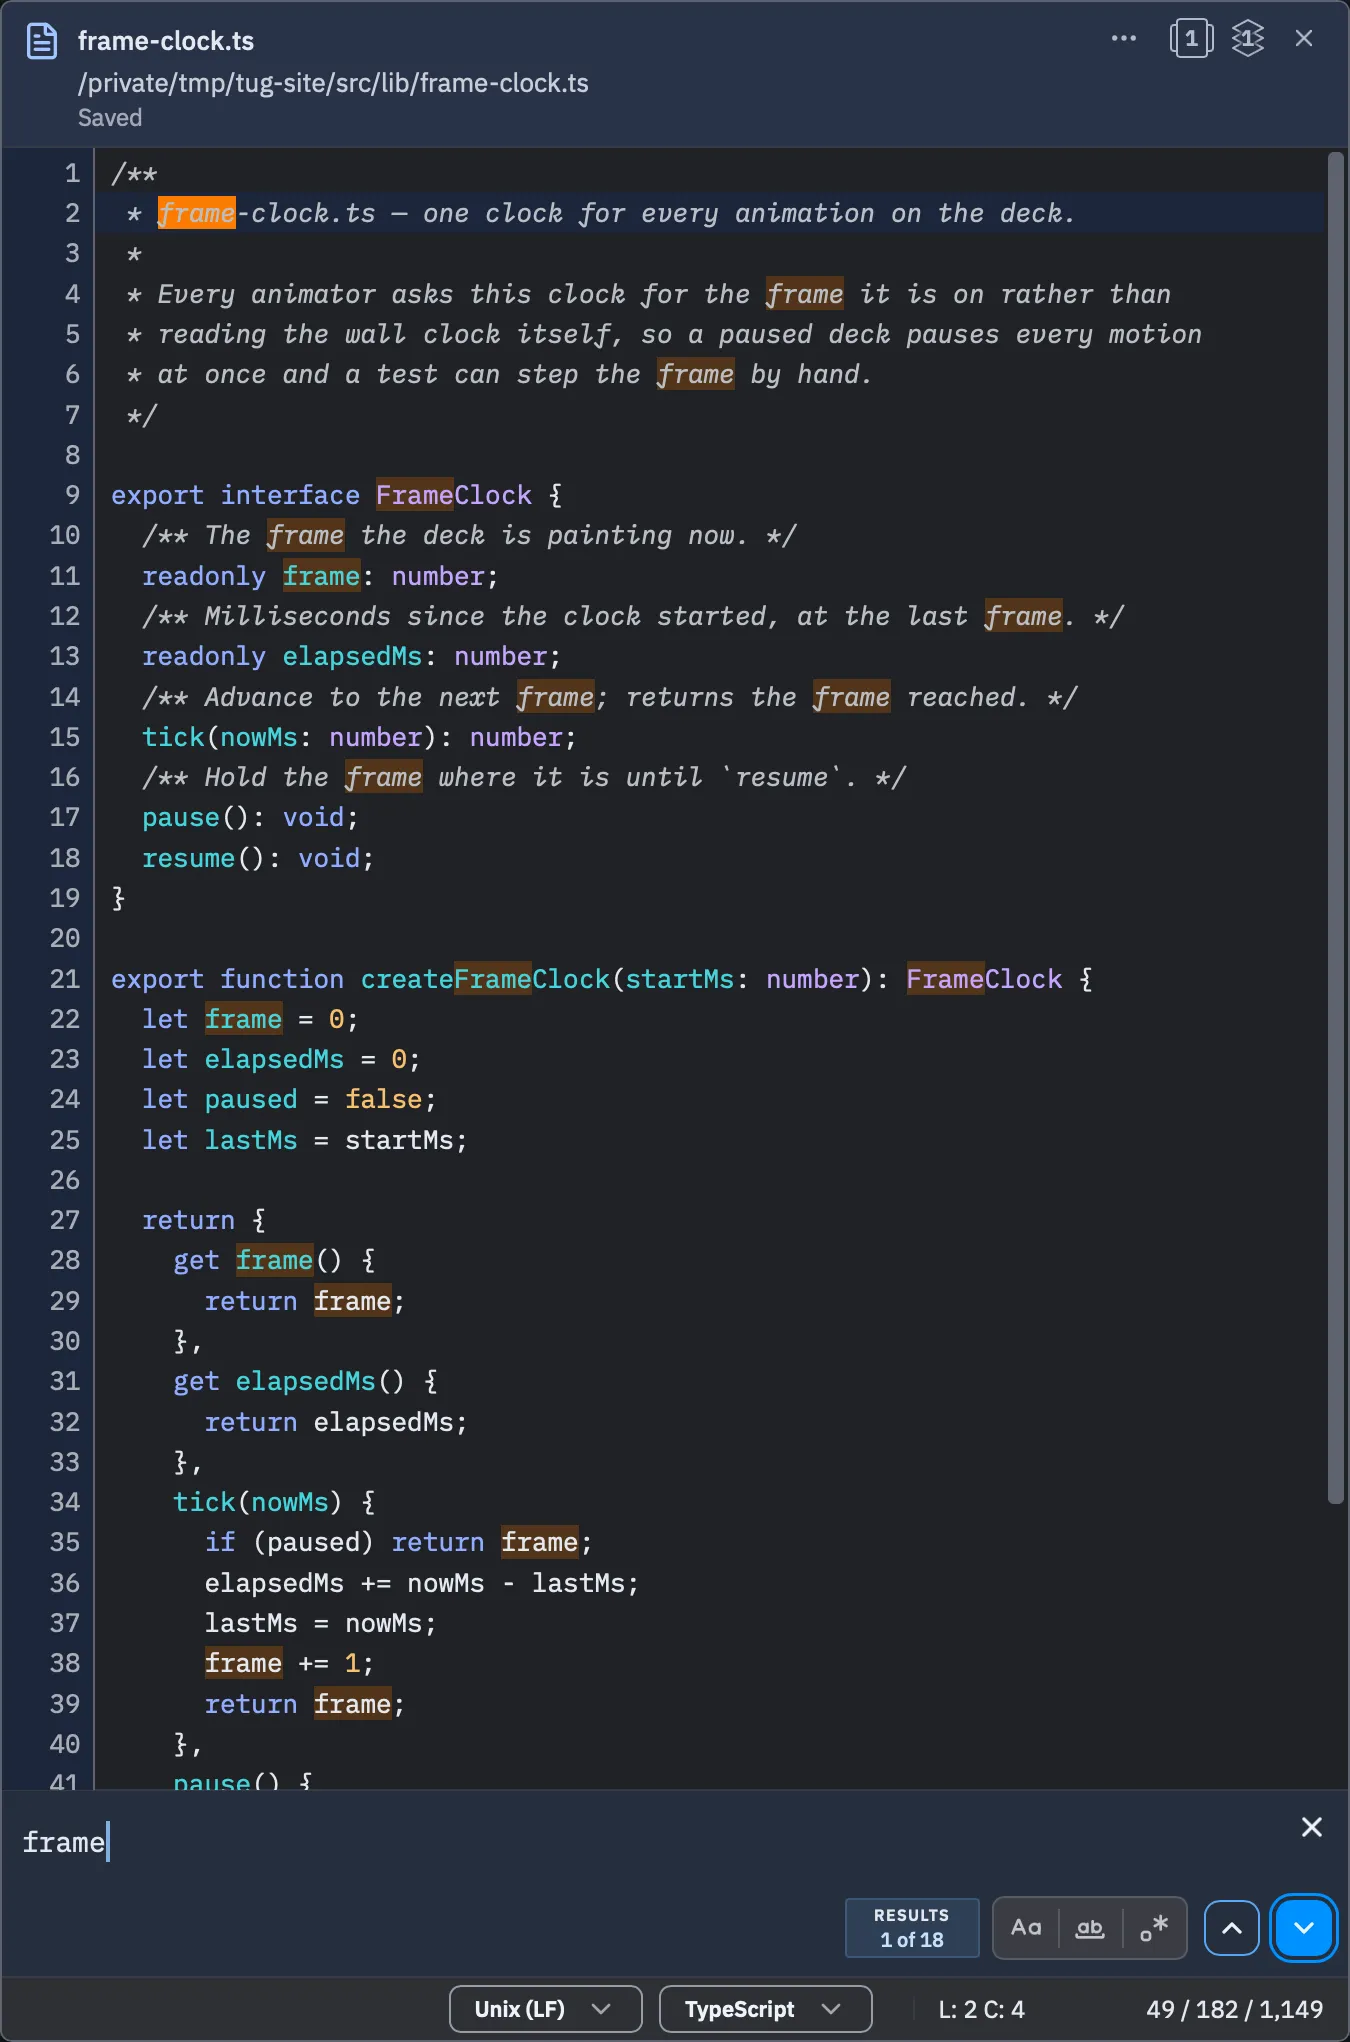
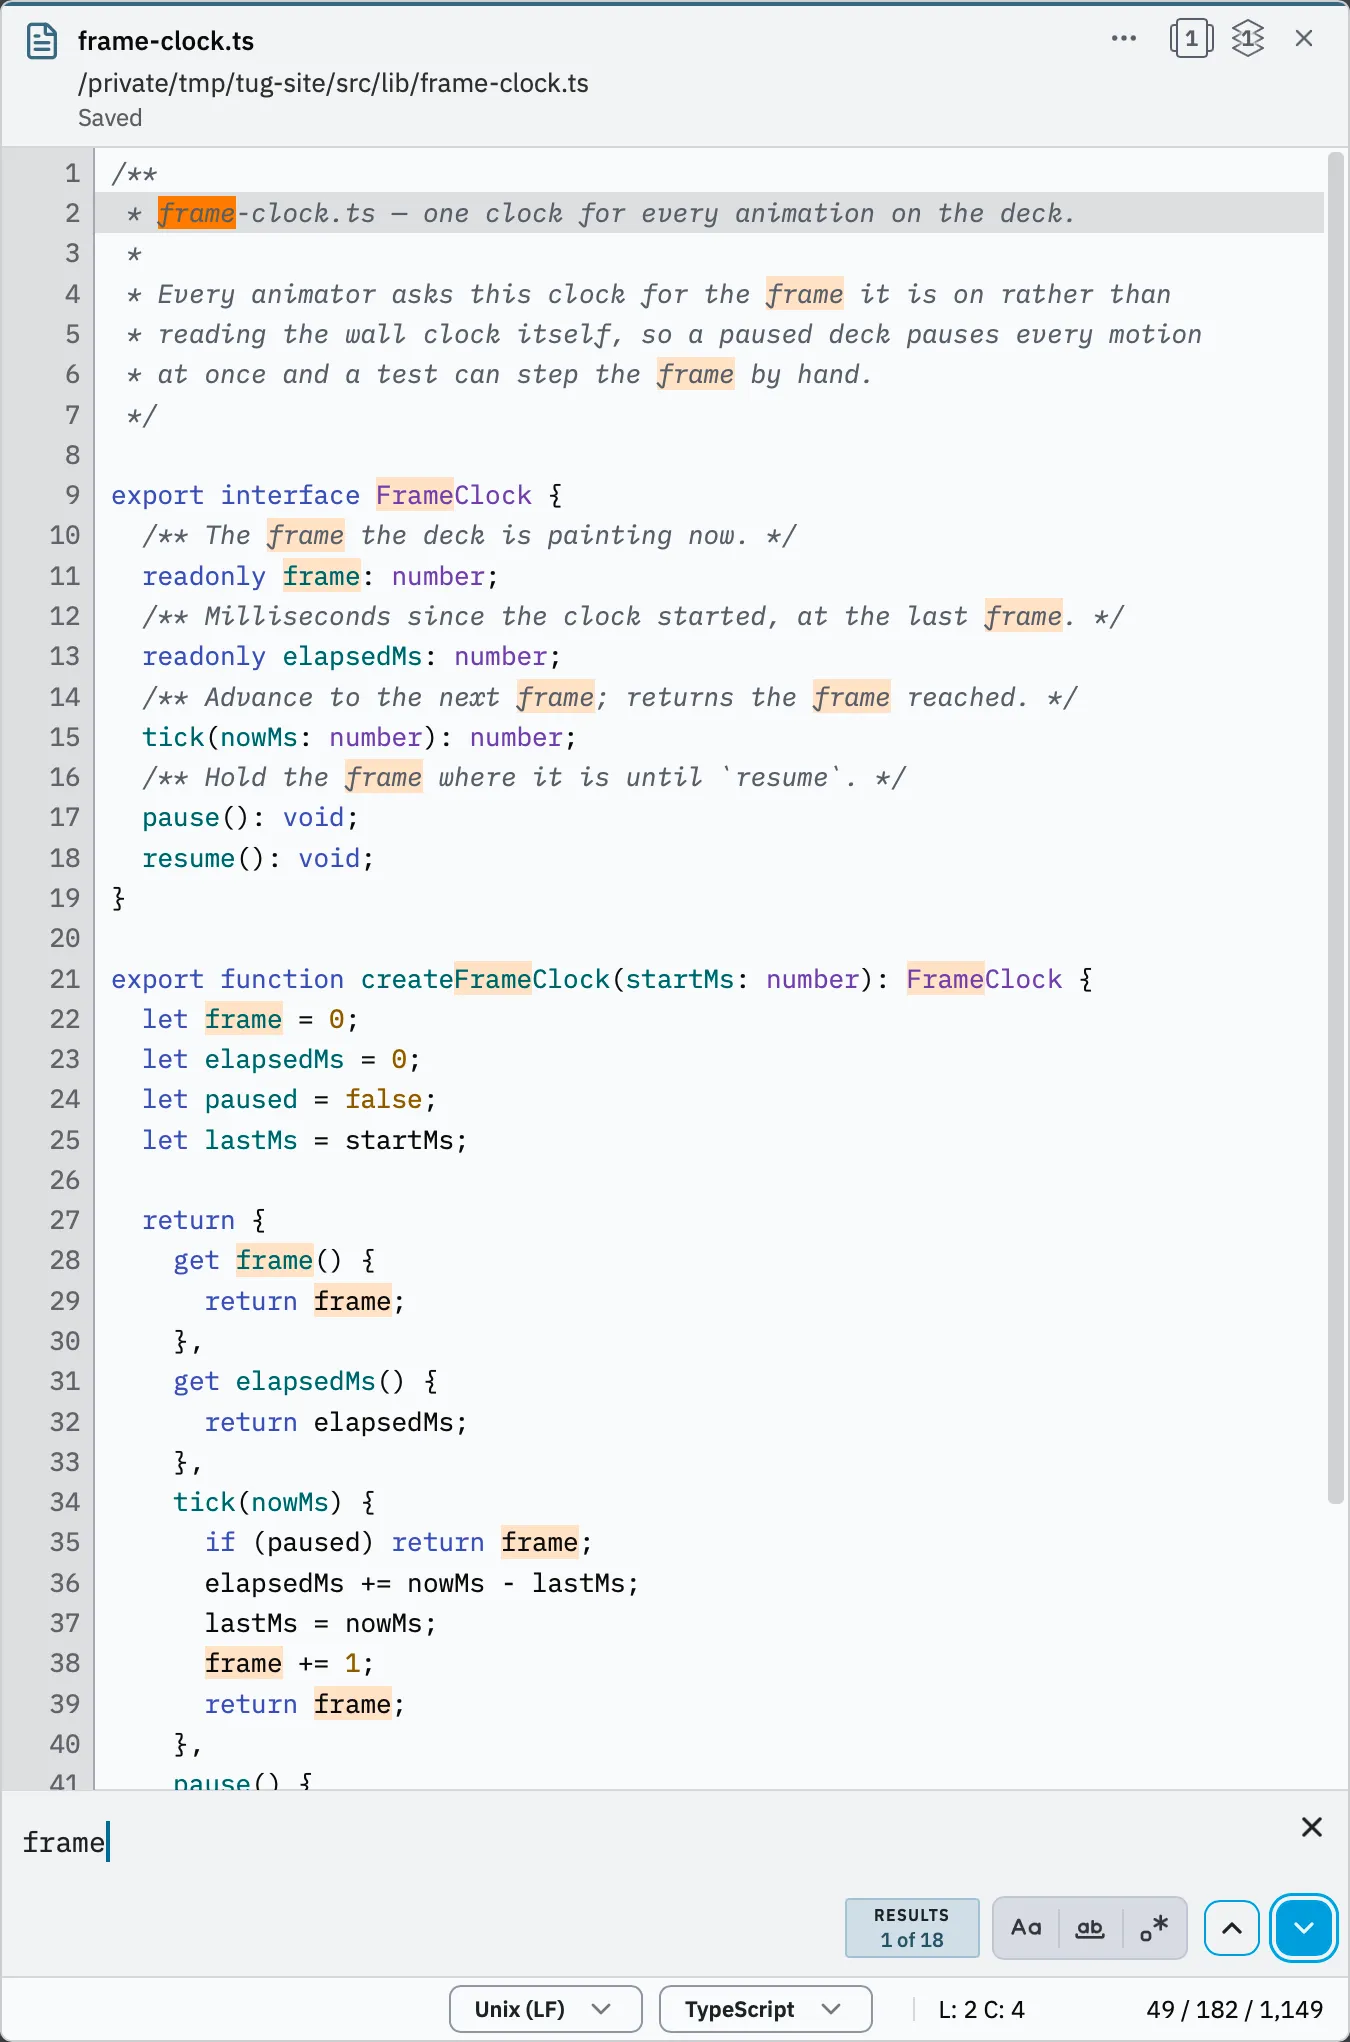
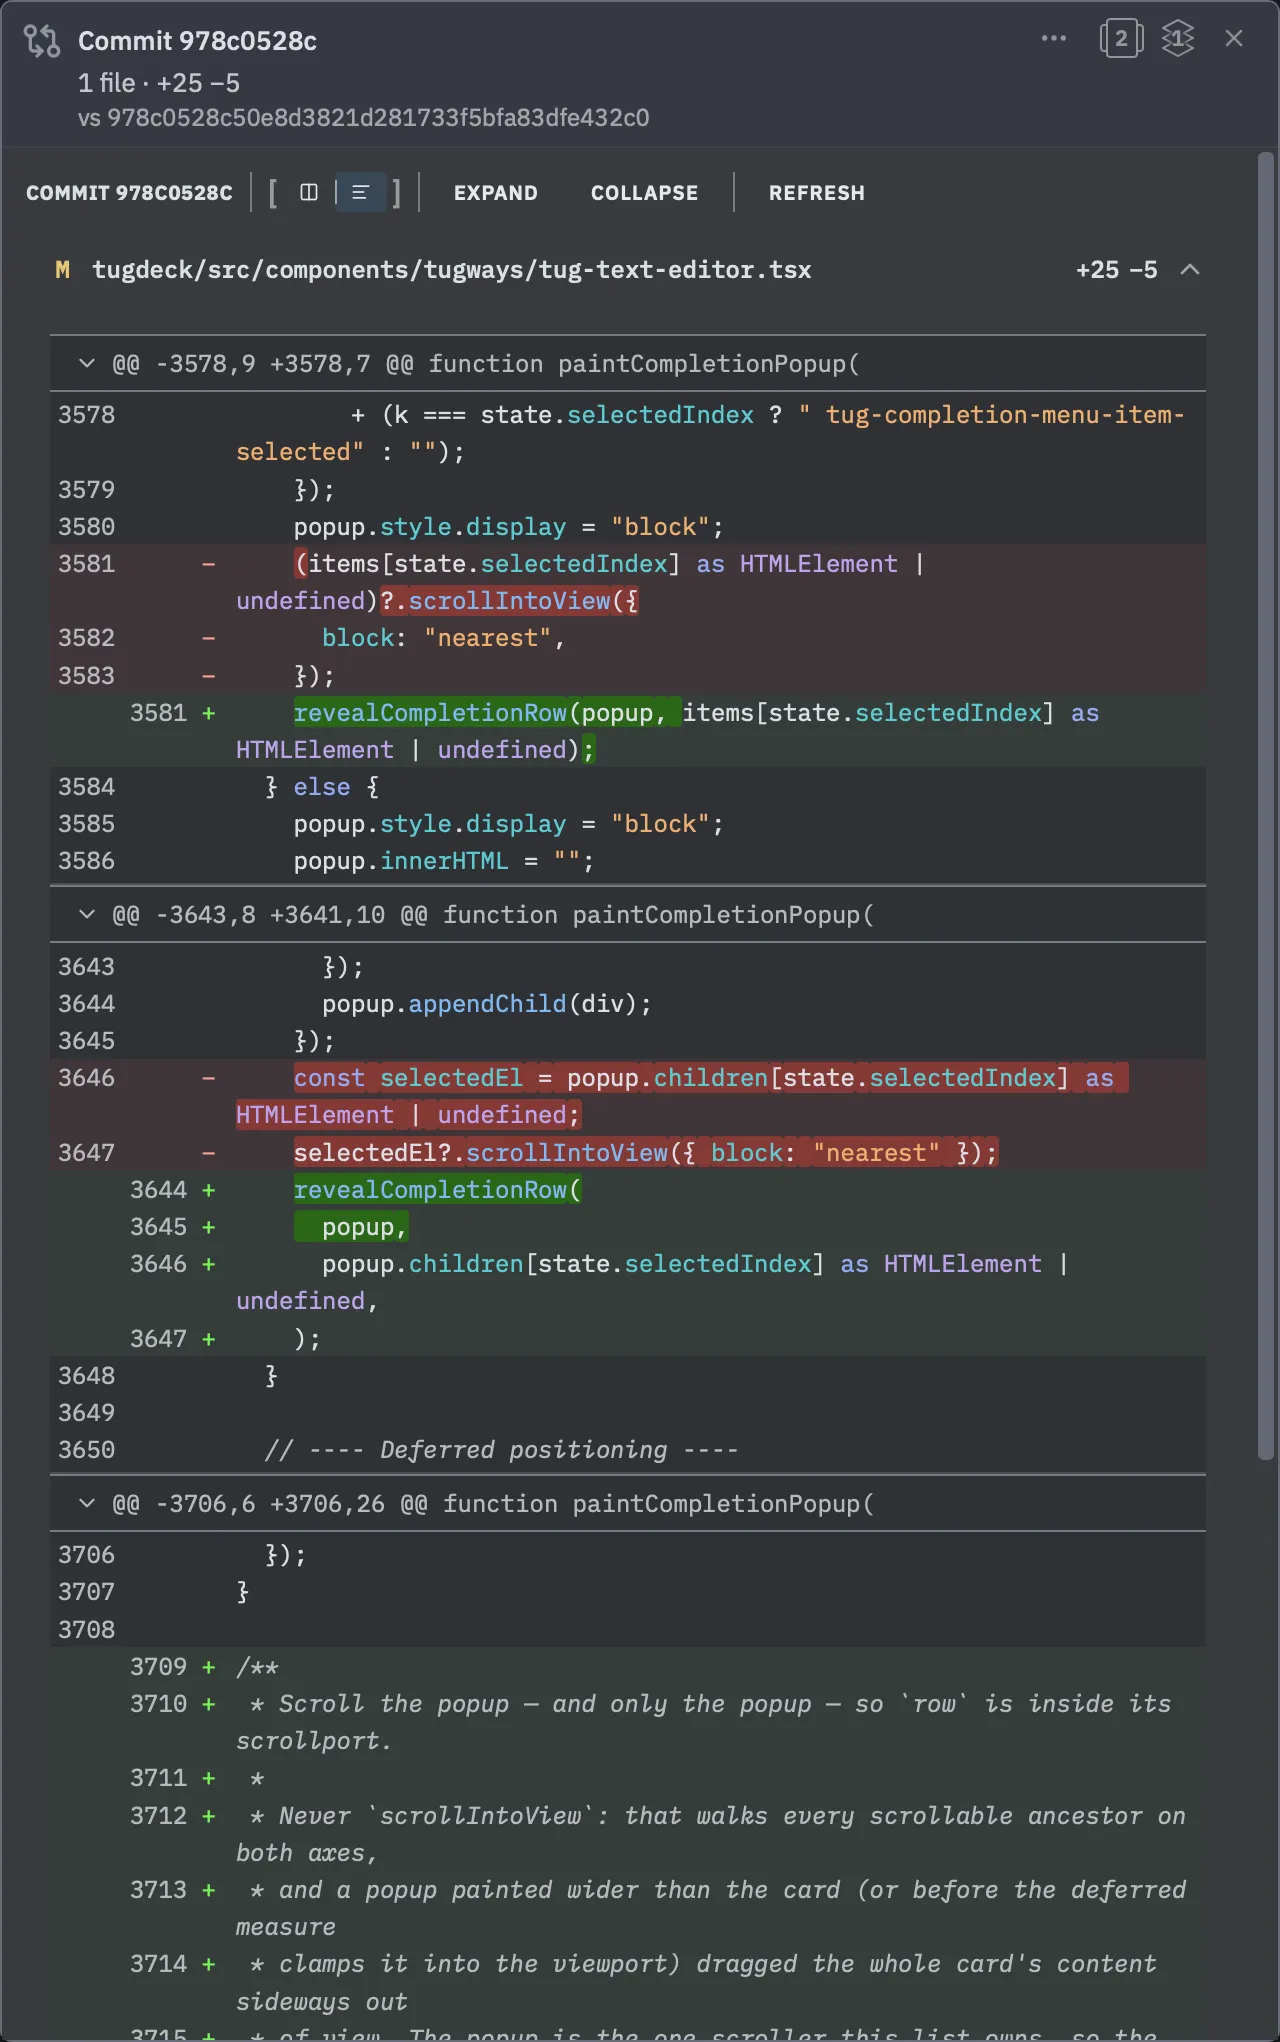
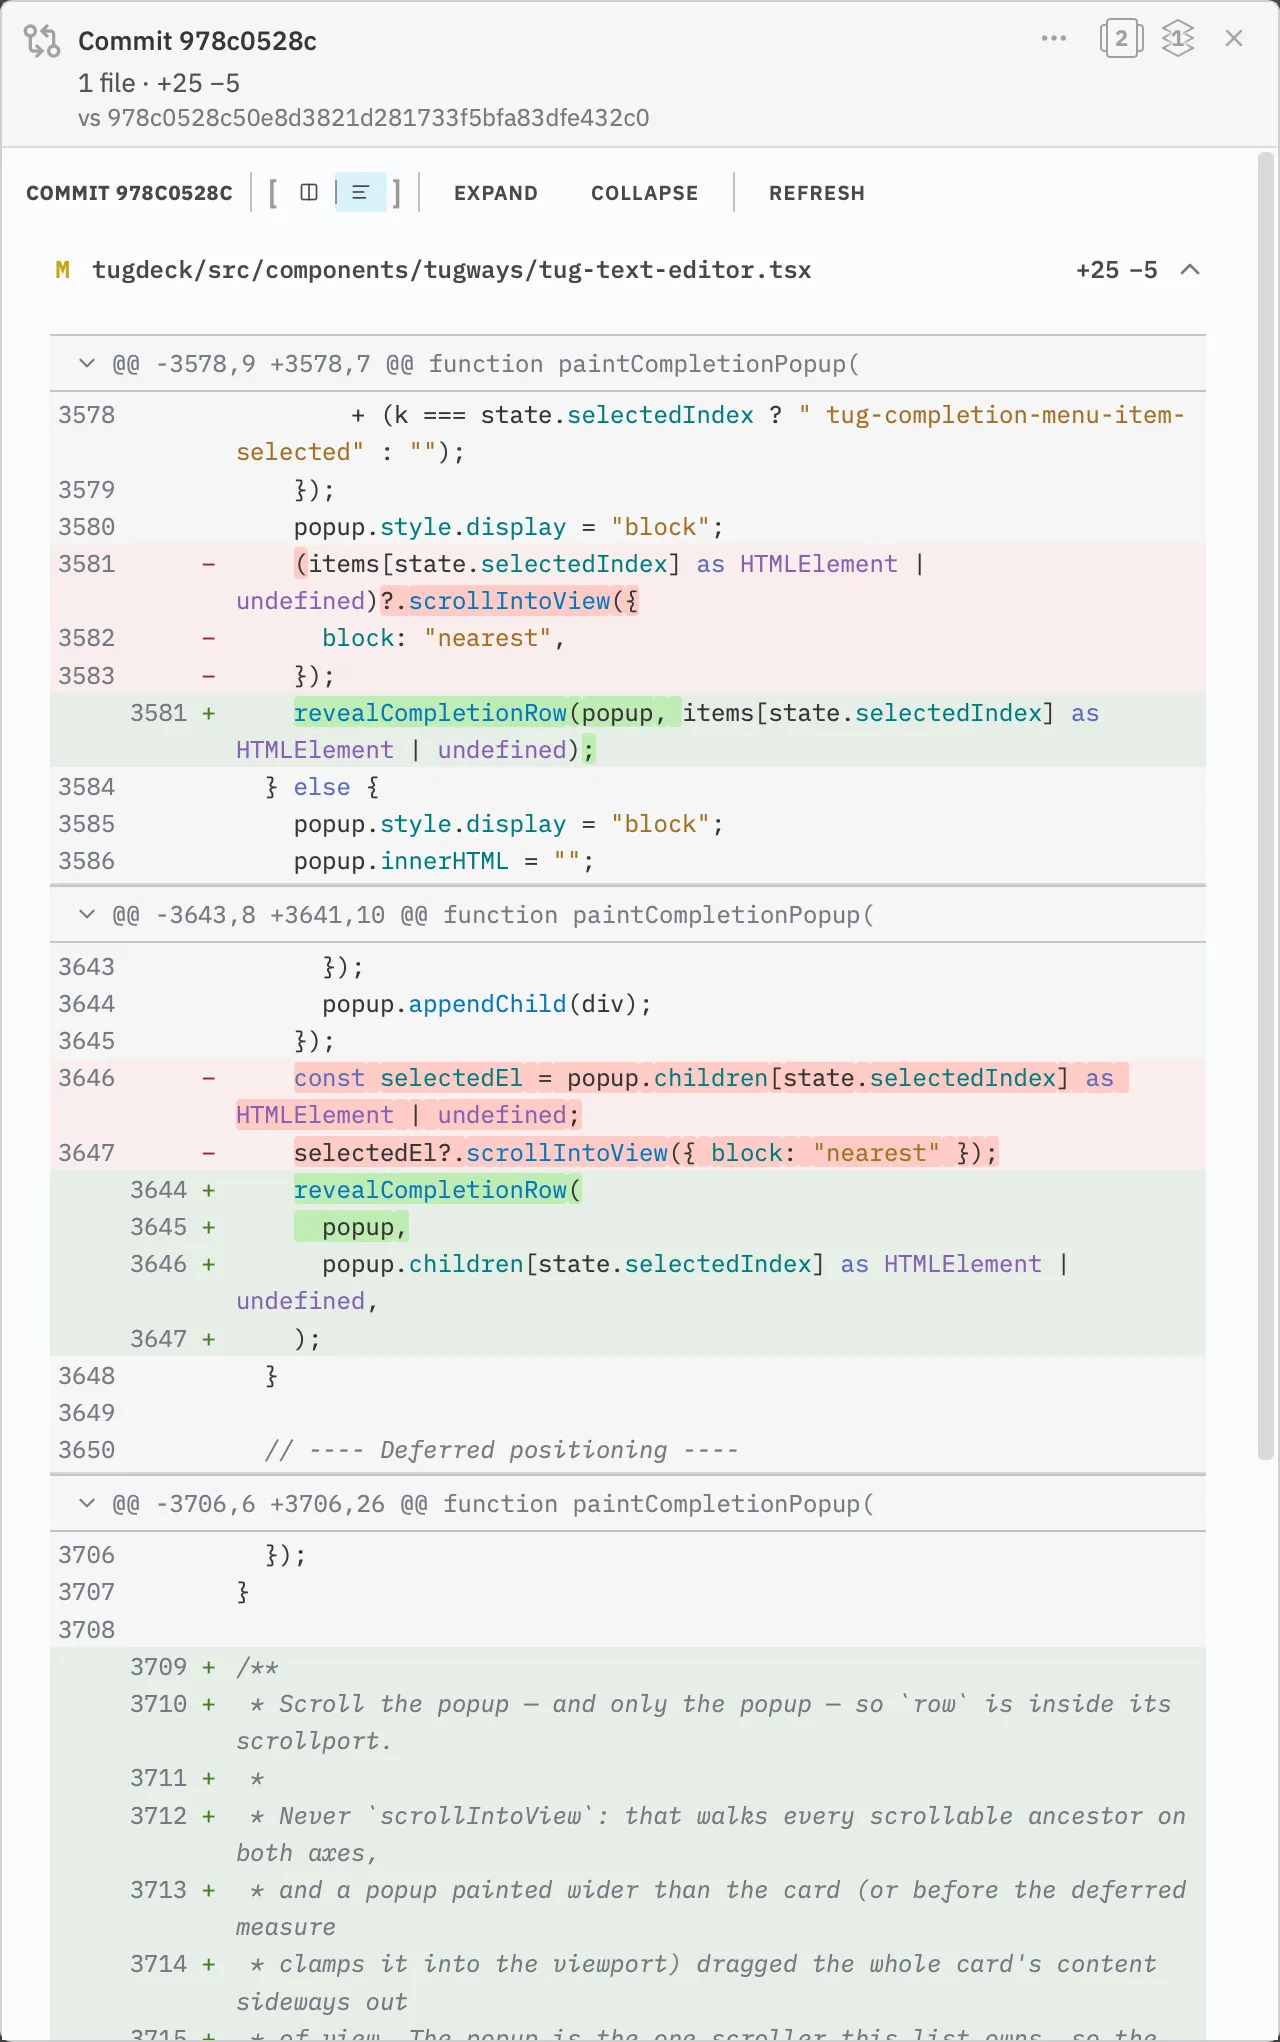
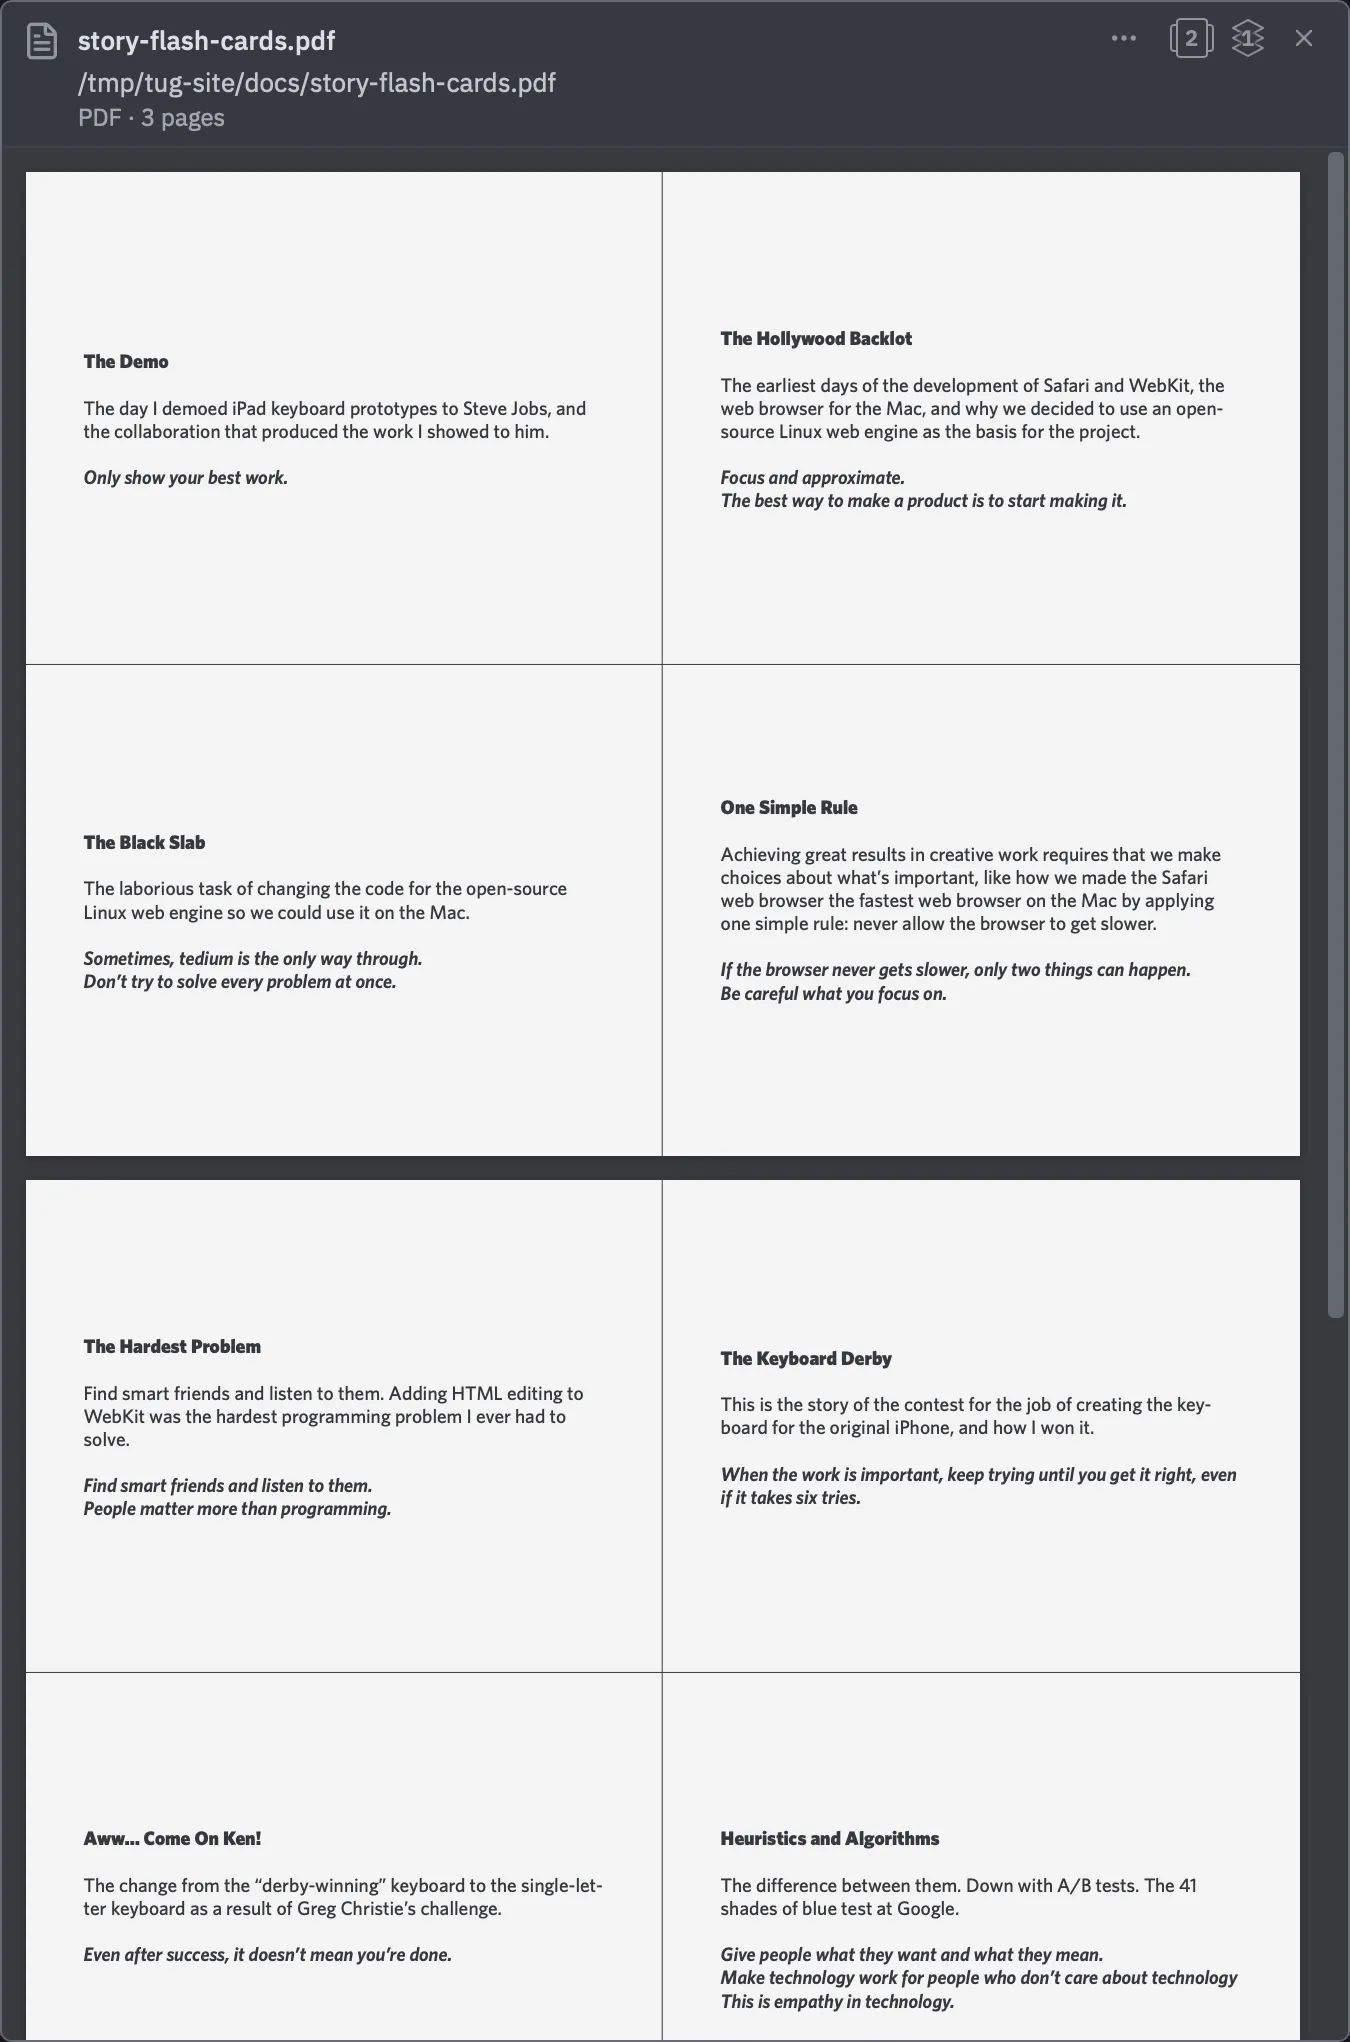
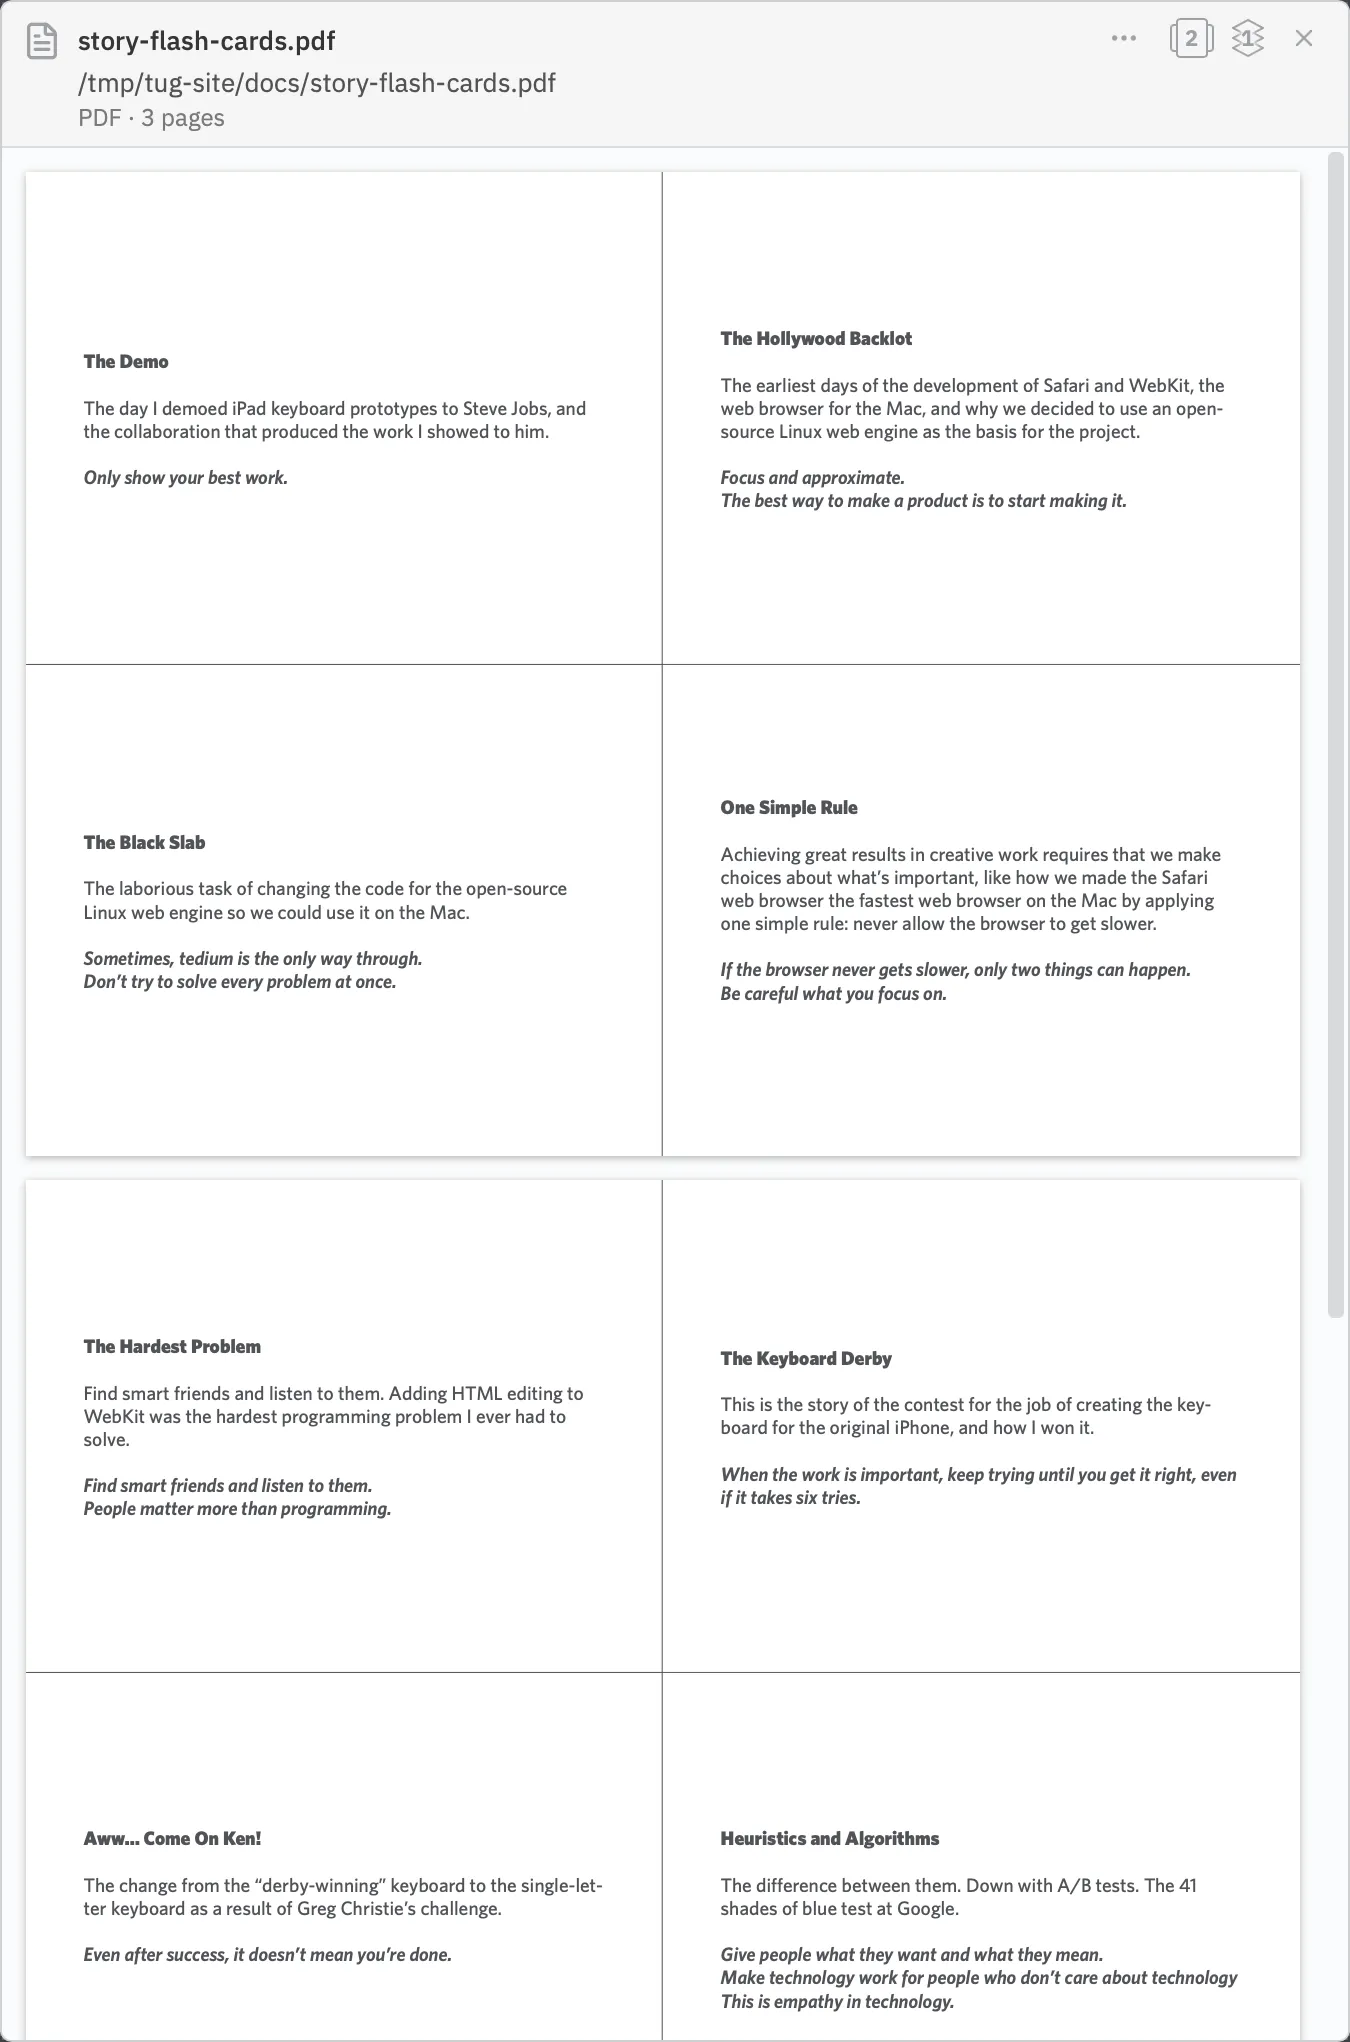
The things a session works with open beside it, on the same deck, rather than in another app. The file it is editing, the diff it just made, the screenshot it took, the PDF it is citing: each opens as a card in a slot next to the session, so you read the model’s work where the model is doing it. The Text card is a CodeMirror editor, a find bar, and conflict handling. The Diff card shows the project diff, inline or side by side, whole or scoped to a path, range or commit. The Image card shows a picture fit to the card, filling it, or at actual size, and a click opens it full screen. The PDF card reads a document page by page, continuous, single or two-up, at any zoom, with the arrow and page keys turning its pages. The Commit card opens one commit’s full record.


Every edit is attributed
When several AI sessions work at once on one checkout, git sees one tangled pile of changes. Tug straightens it out. It keeps a ledger that records which session made each change, so when it is time to commit, each session knows what it did. A session’s link to an edit is a claim, and claims are written for you by the AI model as the work happens: a file edit claims its file, and a shell command that names its files claims those. Edits you make yourself, in your editor or in the card’s own shell, are never hidden and never claimed by anyone. They show up as unattributed, and git status, not the ledger, decides what exists.
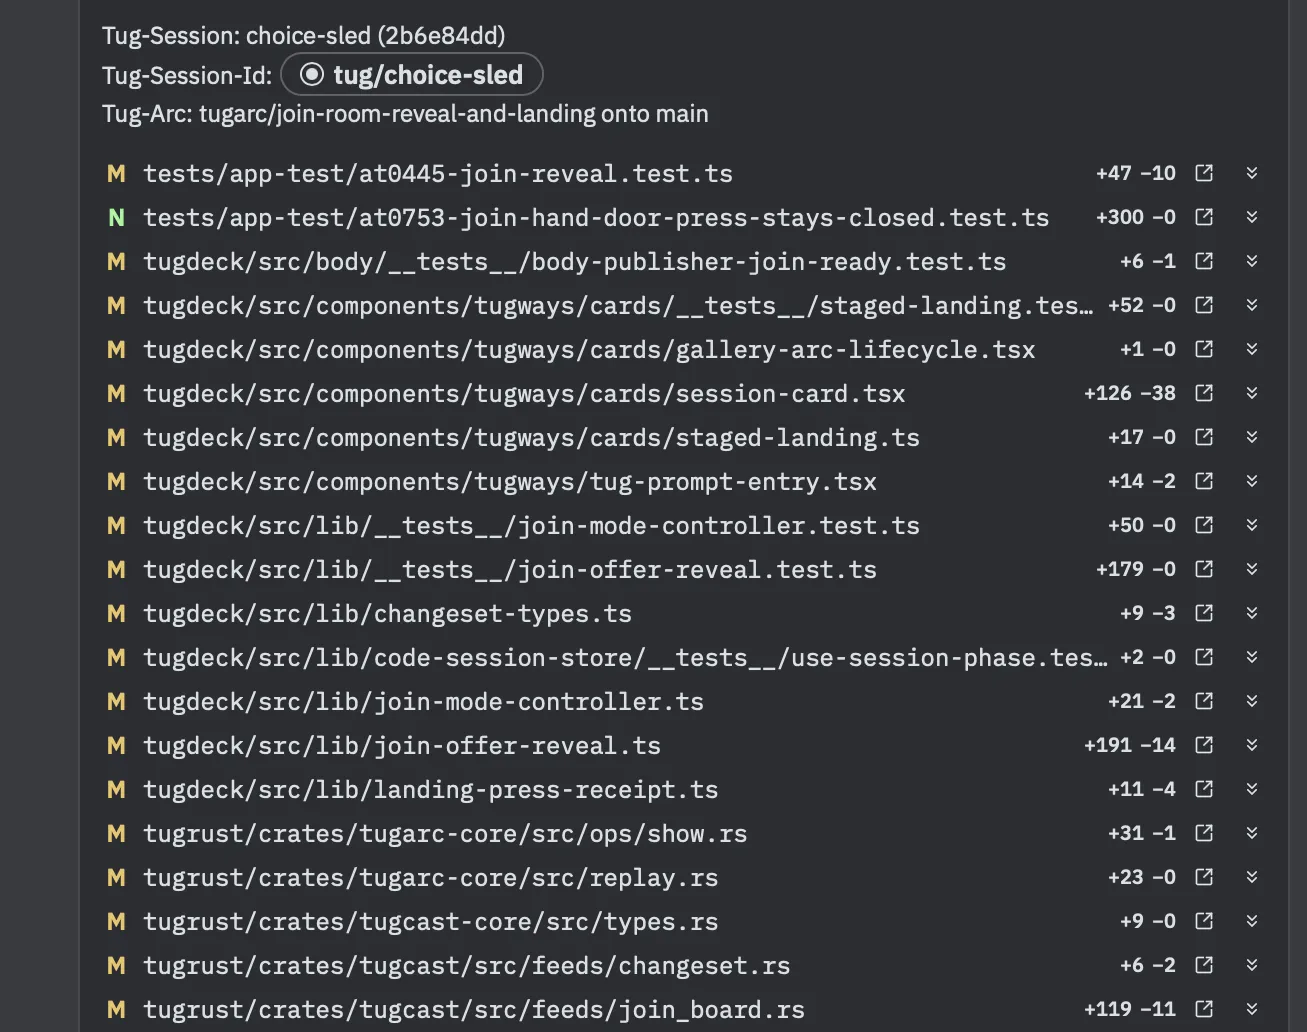
What this buys you is a way of working that a plain checkout cannot support. Three sessions can run on main at the same time, one fixing a bug, one tightening a test suite, one rewriting a page, and each one commits its own work as it finishes, without a worktree or a branch apiece. You can review one session’s changes while the others keep going. You can land half of what a session did now and leave the rest in the tree for later. Your own hand edits stay in plain view, waiting for you to say which session they belong to, or none. Close a session with work still uncommitted and nothing is lost: its files become orphaned, and any session can take them up. When two sessions reach into the same lines, Tug marks the file as shared and asks, rather than letting one quietly bury the other.
The Changes tab on each session card is where this plays out. It sorts the checkout into this session’s changes, unattributed changes, orphaned changes and the arcs in flight, with a status mark, a line count and a diff on every file, and a checkbox on every hunk. Claims are yours to move: Claim brings a file or a hunk into this session, Disclaim lets it go. A commit takes exactly this session’s work by default, and anything unattributed or shared starts unchecked, so nothing lands that you did not decide on. Ask for a message and Tug drafts one from the diff and the session’s prompts, and the commit arrives in the transcript as a receipt that names the session that made it.
Big changes run as arcs, a better way to use git worktrees
Substantial changes with AI go wrong in a familiar way. The model works on your checkout for an hour, main moves underneath it, you lose track of what is done, and at the end you are handed one enormous diff with nothing to read it against. Git has a tool for this, the worktree, but it is a chore to use by hand. You make a second directory and a branch, keep straight which one belongs to which job, remember to rebase as main moves, merge by hand at the end, and then clean up the branch and the directory, or forget to. An arc is Tug’s answer. The name is the metaphor: a curve that departs a line and returns to it. An arc takes the worktree and does all of that bookkeeping for you: the work leaves your main branch on its own worktree, is driven through stages by the app, and comes back through a join. Completing changes apart and bringing them back cleanly is what makes it practical for AI to take on bigger projects, and several at once.
- Ideatyped into a session
- Sketchthe conversation, converged; never a file
- Briefwhat was found and decided
- /arcthe door; picks plain or planned
- Devisewrites the planplanned arc only
- Reviewreads it cold
- Implementone step per turn
- Auditreads the diff cold
- Joinyou press it; one commit on main
You start with an idea. An arc begins the way most work does, as an idea typed into a session. You talk it over with the model until the shape is settled, a sketch that lives only in the conversation. When it is, /tugplug:brief writes it down as a brief, a short record of what was found and what was decided, which is the document you would have wanted anyway. Then /arc is the one door. It takes the brief, or writes one from the conversation, chooses whether the work needs a written plan first, and hands it to the app. You never write a spec cold, and you never have to decide up front how big the job is. That door reads the work and says which shape it chose and why.
You can look away. From the door-opening moment on, the app drives. The stages run on a session card bound to the arc, and the wheel seats a fresh session for each one, so the transcript, the name and the card’s place on the deck stay put while the model underneath changes. Implement walks the plan one step per turn and closes each step on its checkpoint. Every hand-off is checked by machine, so a stage that ends without what it owed stops the arc with a reason, and the Arcs sidebar shows you where every arc in every project stands. Your own checkout is untouched the whole time. Keep working on main, or run three arcs side by side in one window.
The work gets a second opinion that is really a second opinion. On a planned arc, the plan is reviewed by a session that did not write it, against a rubric and the project’s own rules, and when a decision is yours it stops and asks in writing rather than guessing. On every arc, the finished diff is audited by a session that never saw it being made, read against the plan and the brief, with mismatches fixed as commits. Cold eyes are the point. The author never grades its own work.
If main keeps moving, that’s fine. As your main branch advances, Tug replays the arc’s commits onto it automatically, whenever the worktree is quiet. A conflict is met while it is small, by the session doing the work, instead of in one pile at the end. By the time the arc is finished, it already fits the main you have now, not the main it started from.
It lands when you say so. A join is the merge back to main, done by Tug and asked for by you. The model never joins. It drafts, the audit writes the commit message, and the Changes tab offers the join once the audit has signed off. Press it and Tug checks that the base is clean and the arc fits, resolves what a conflict ladder can resolve on its own, and lands the whole arc as one commit with one receipt in the transcript. The branch and the worktree are cleaned up behind it, so you never open a terminal to merge, prune or delete anything. Nothing here is a one-way door: an arc can be discarded with its uncommitted work copied back to you, and a join, a replay or a discard can be undone.
Data visualizations in the transcript
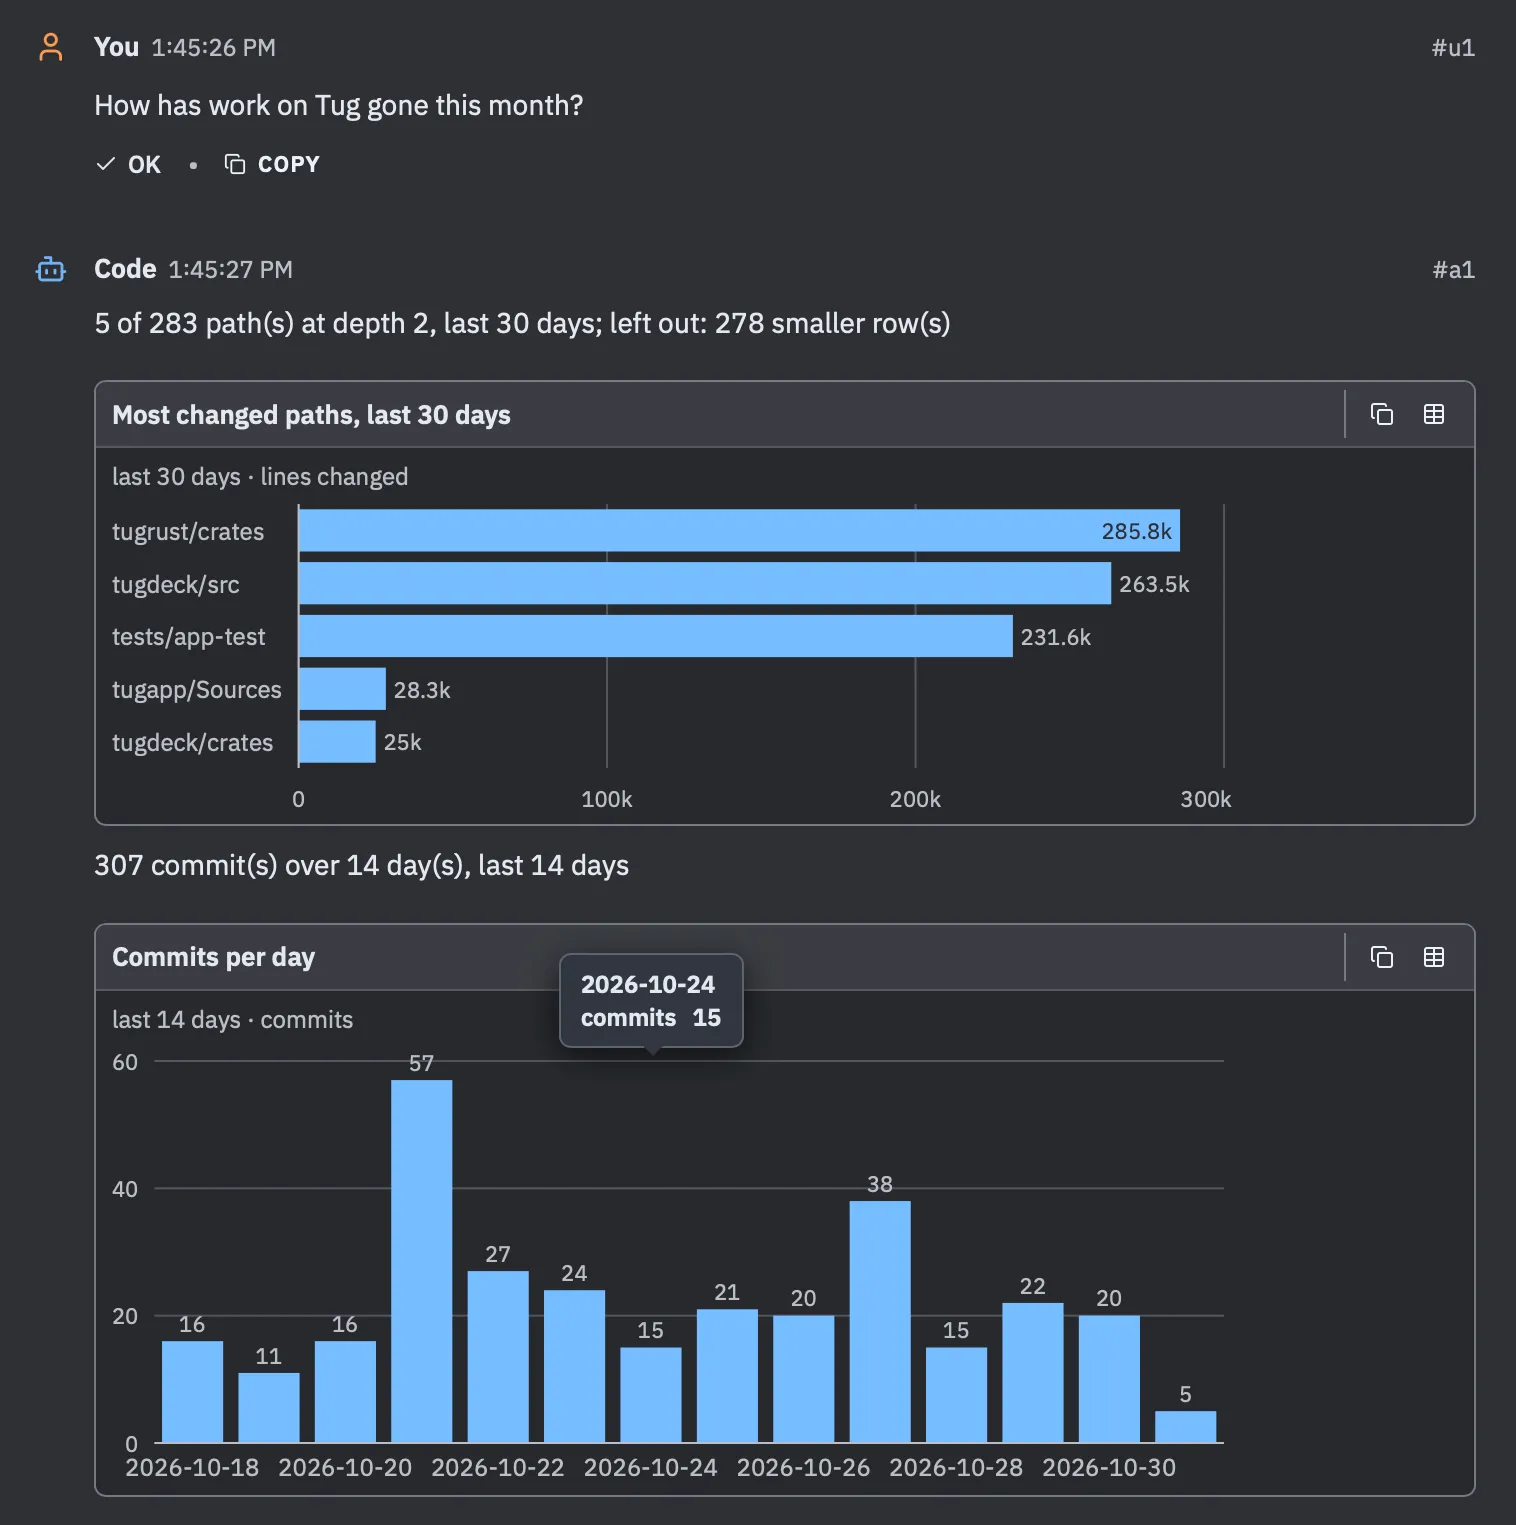
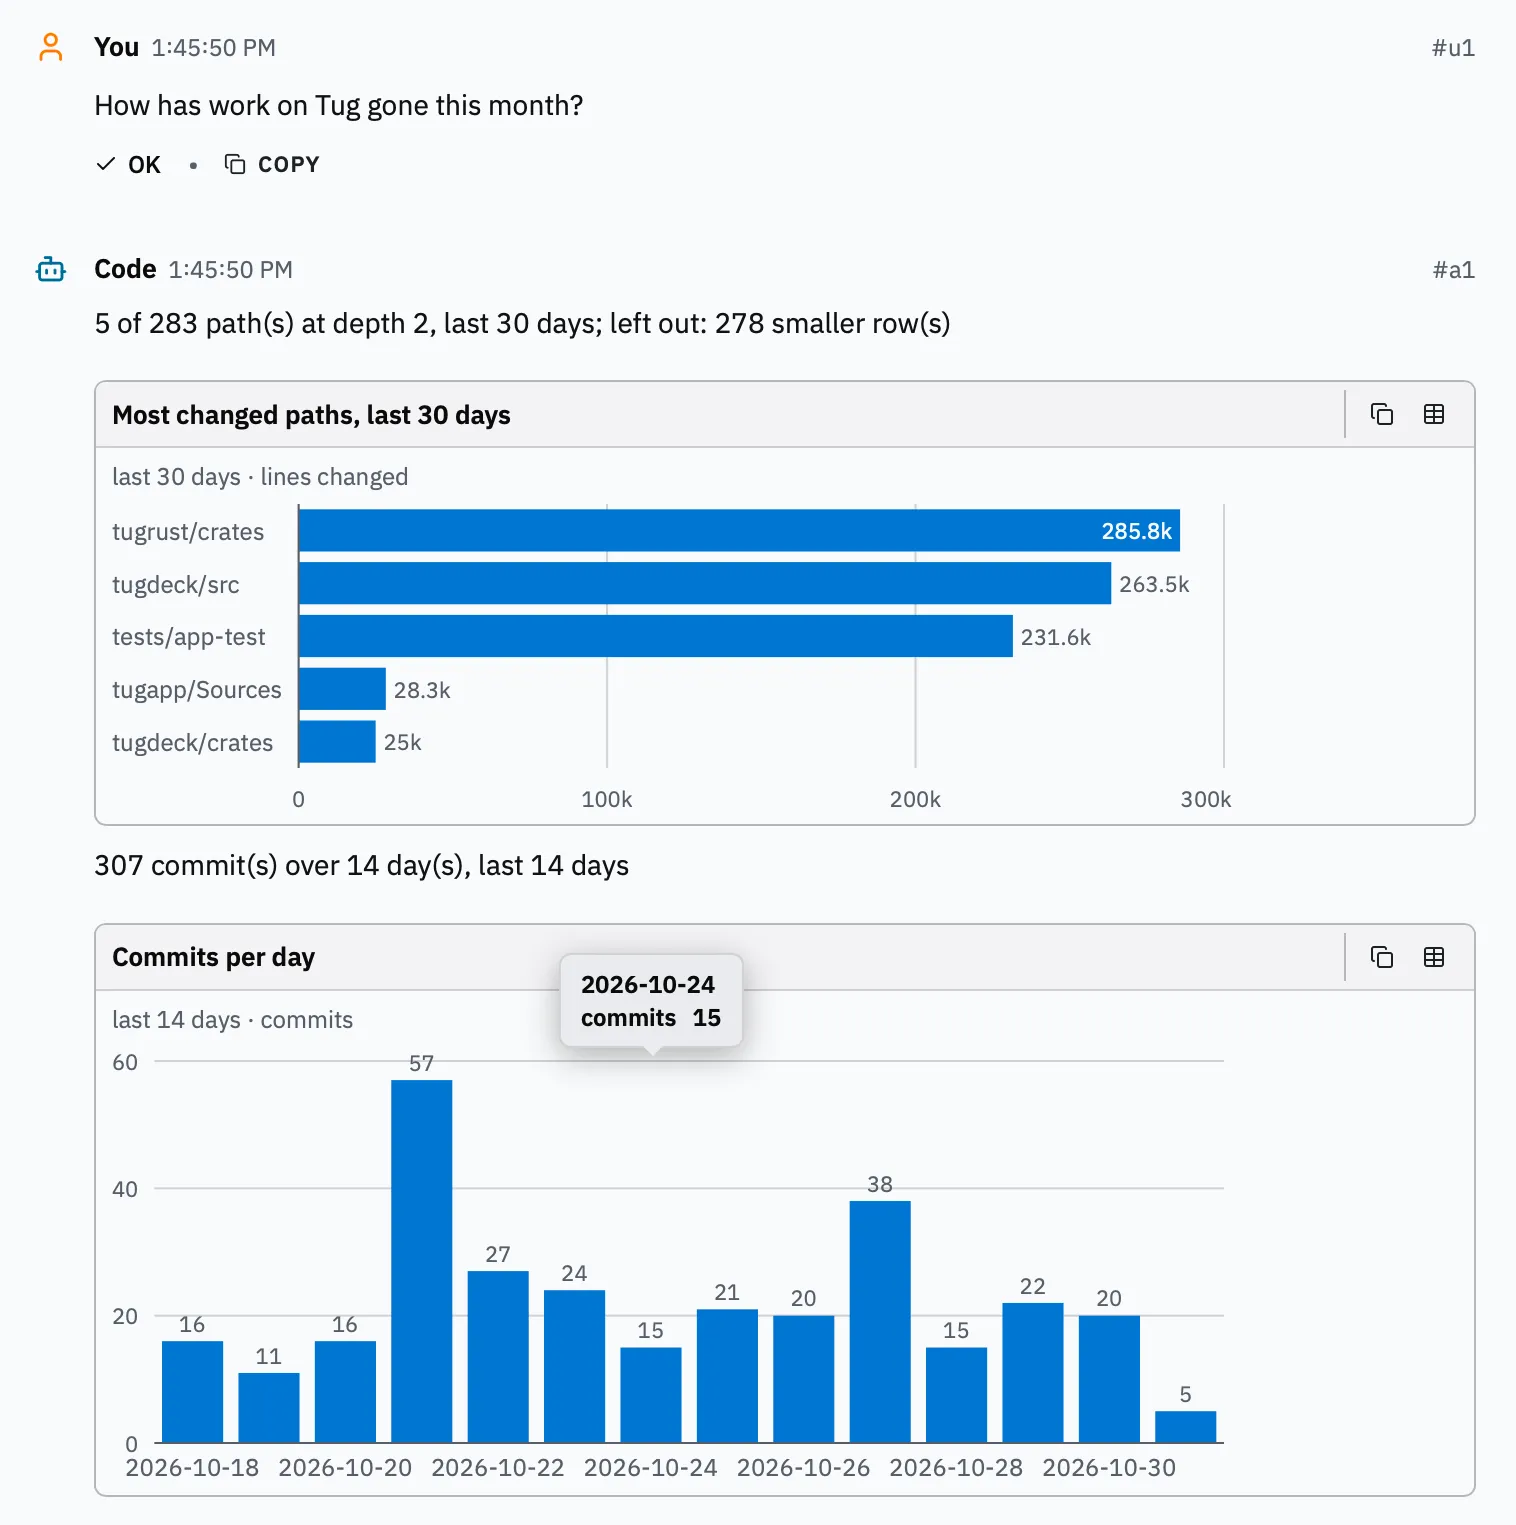
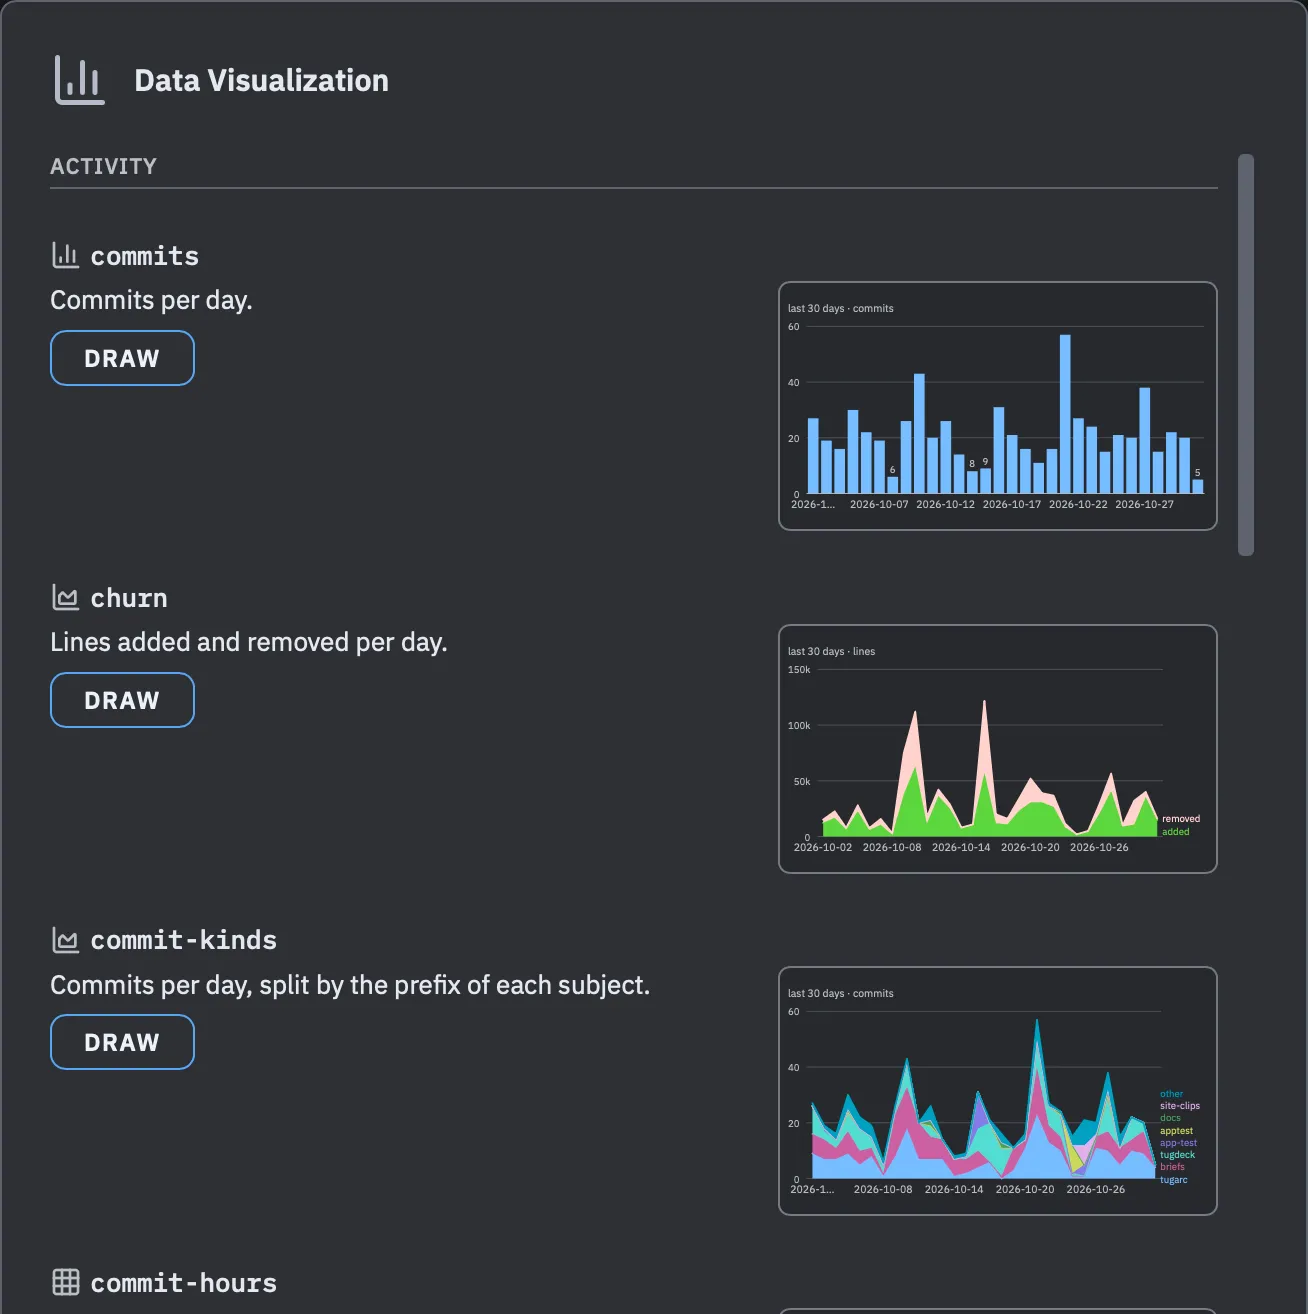
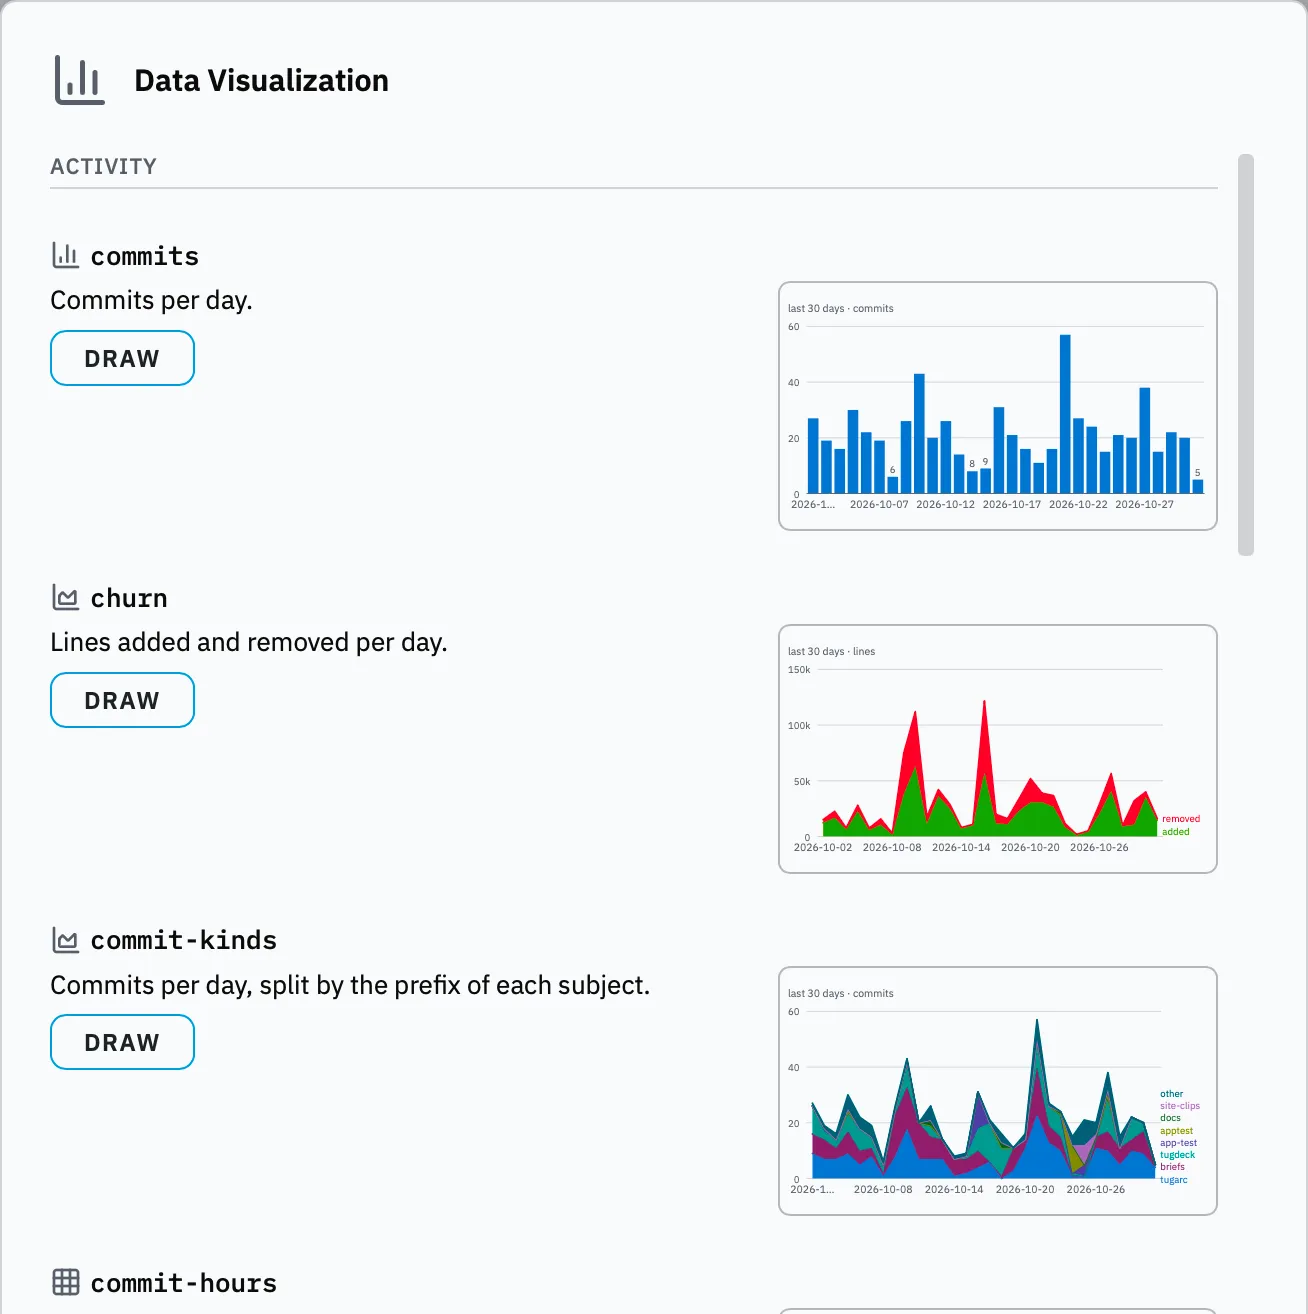
When an answer has a shape, a session can draw it. Charts render right in the transcript, set in Tug’s own type and in the colors of your theme, and they change when the theme does. Hover over a mark to read its value, or switch the chart to a table of its data. Many ready-made recipes compute their numbers from your project’s commits, tests and arcs and from your sessions’ records, so a figure is never retyped from the model’s memory: how active the work has been, which files change most, where an arc’s time went, what has been red and when, and what it all cost. The Data Visualization sheet (⌃⌘V) shows every recipe with a figure of what it produces, and Draw puts it in your prompt, where you can narrow it to a path or a number of days before you send it. Or ask in plain words with /tugplug:viz. A question no recipe answers is drawn from whatever holds the numbers: a file, a CSV, or a command’s output.
Ask how anything works
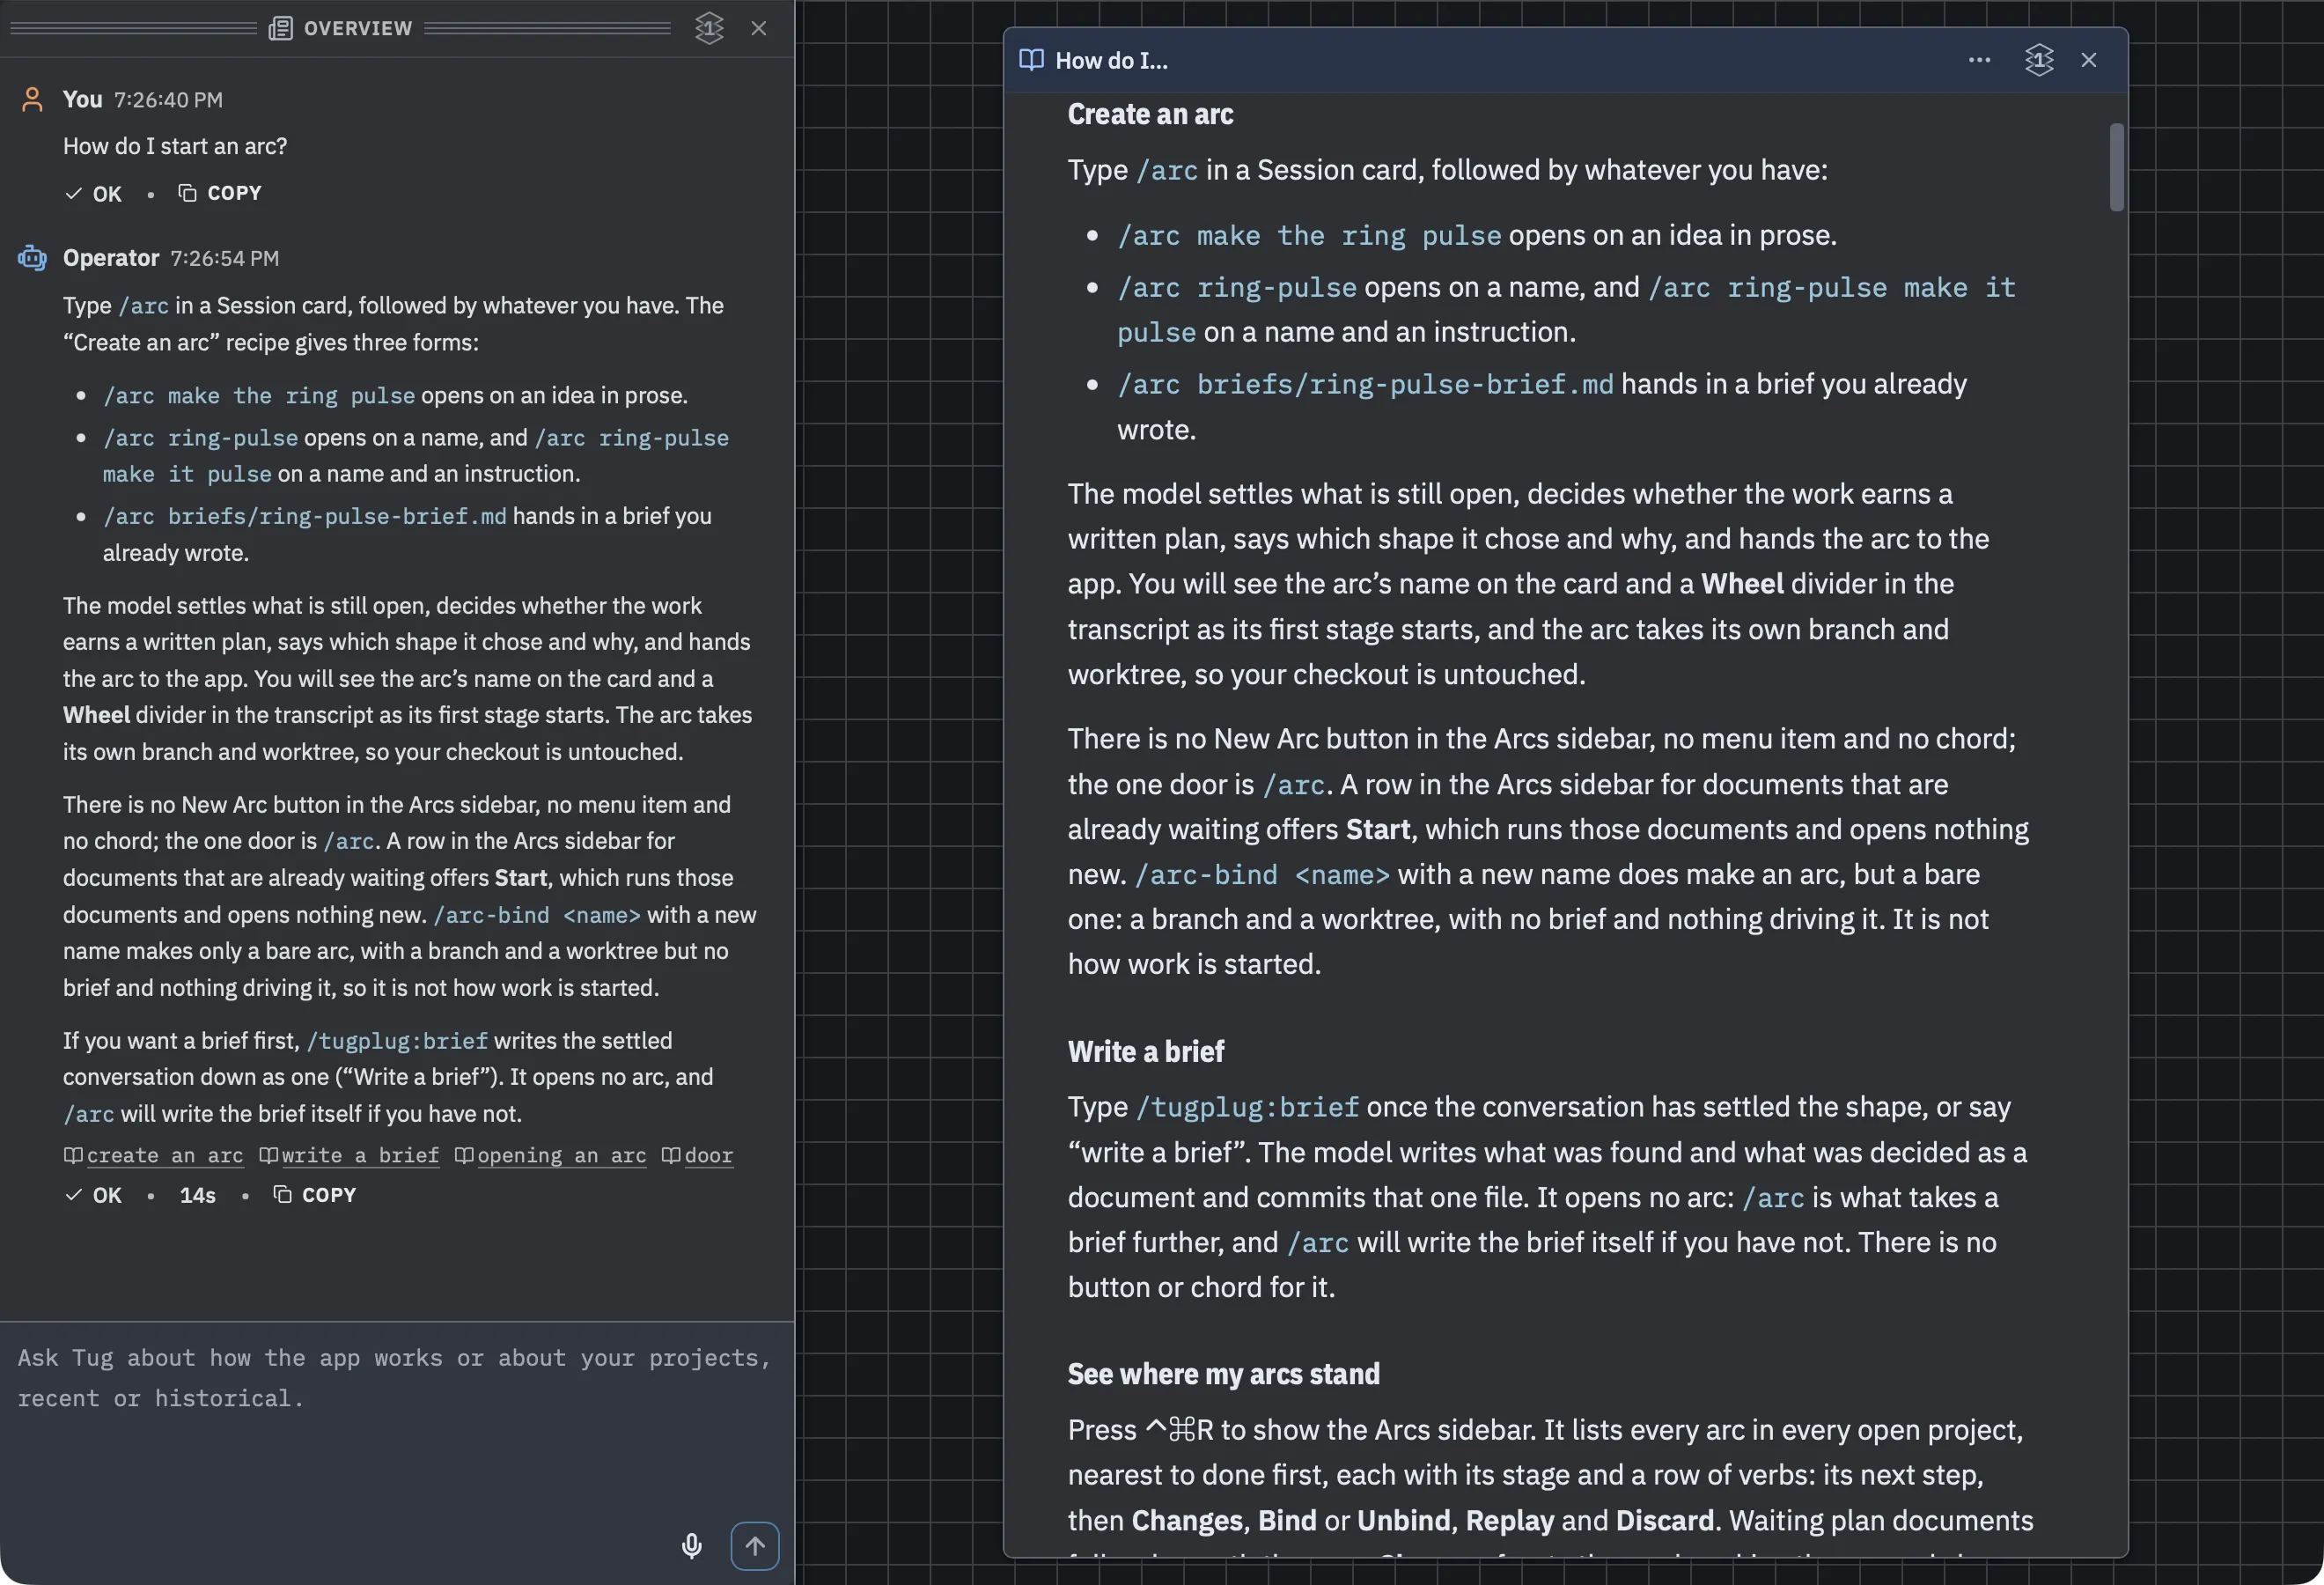
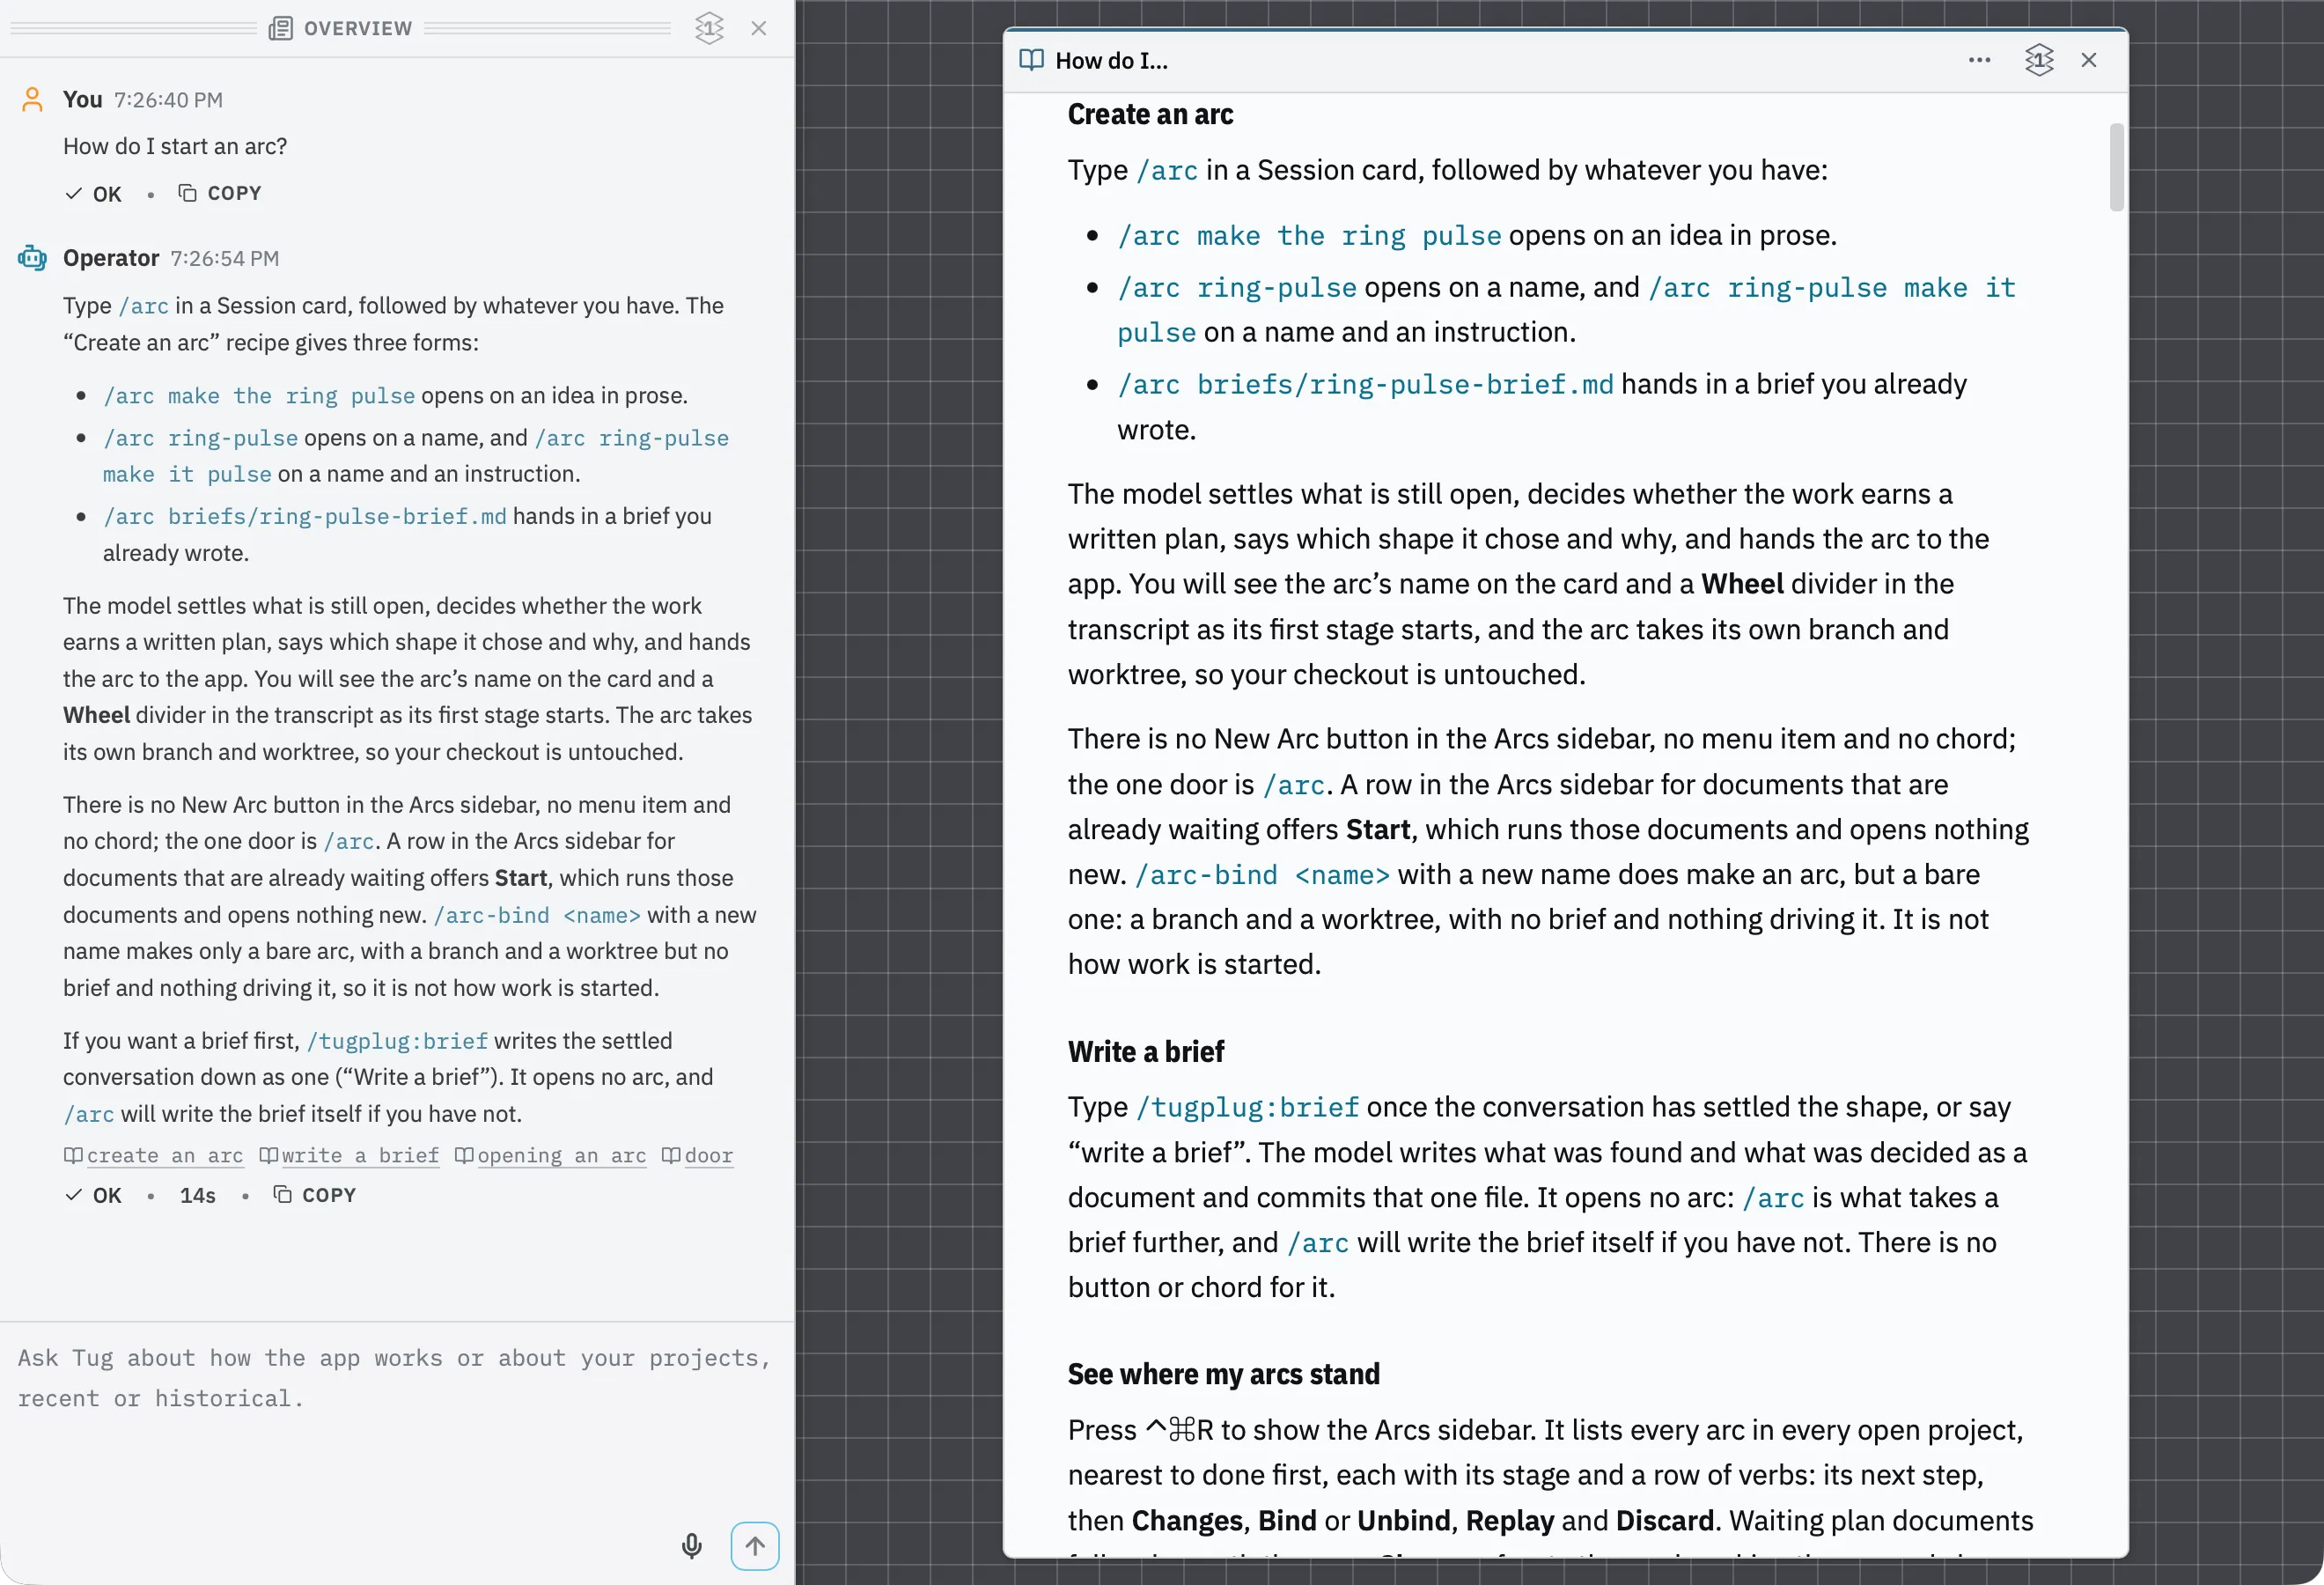
The help is something you can talk to. Press ⌃⌘O to show the Overview and type your question in its composer, in your own words. The answer leads with the gesture, links the passage it rests on, and says plainly when something does not exist: ask how to start an arc and it tells you the one door is /arc, so you never go hunting for a New Arc button. Passages are found by meaning as well as by words, so you don’t need to know Tug’s vocabulary to ask, and the index behind that is built on your Mac with language models macOS already ships. The same composer searches your own history too, across session transcripts and project documents. To read for yourself, the Help menu opens three documents as cards: the feature guide, a glossary, and How Do I…, with dozens of recipes, one per thing a person does.